Documents
Connect an NVR
Note: only Hikvision, Dahua and Uniview NVRs are supported at present.
1. Device Management
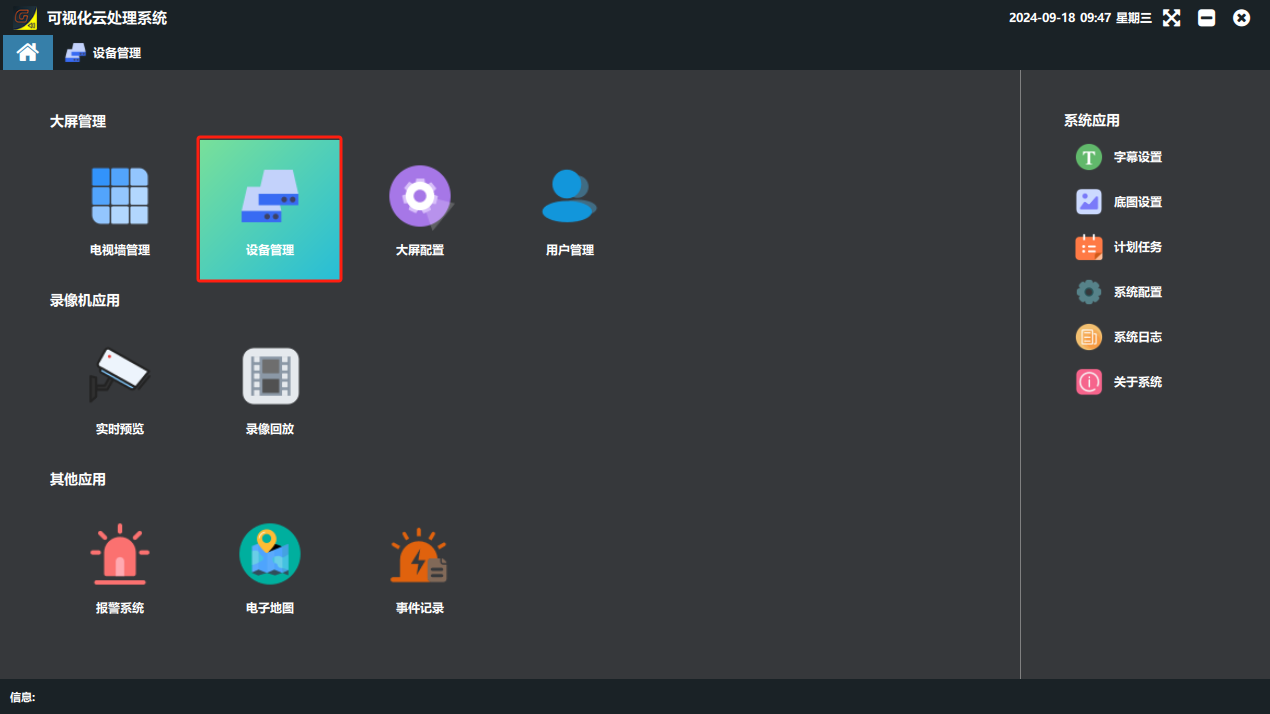
① Click the “Device Management” button.
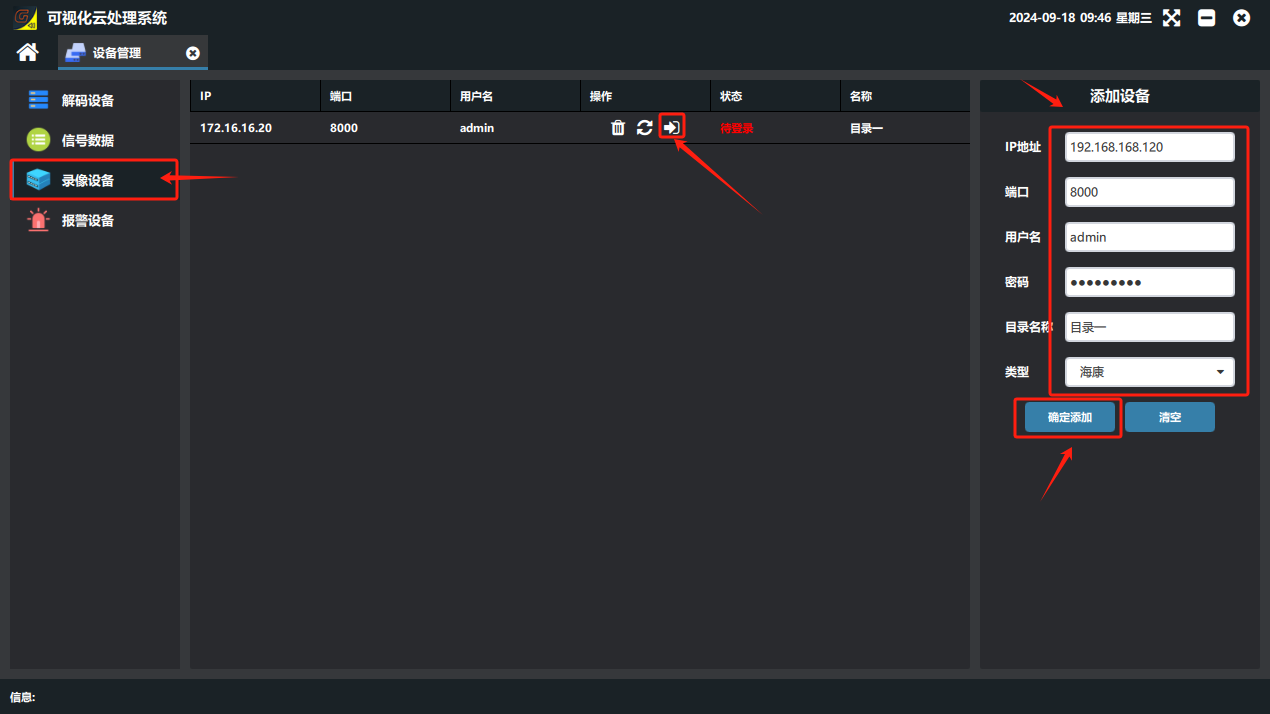
② Fill in the NVR IP address, user name, password and directory name (the name you need) in the information panel → click “Confirm Add” → the added NVR appears in the device list on the left; click “Login” → “Login Successful” in the Status column means the device was added successfully.
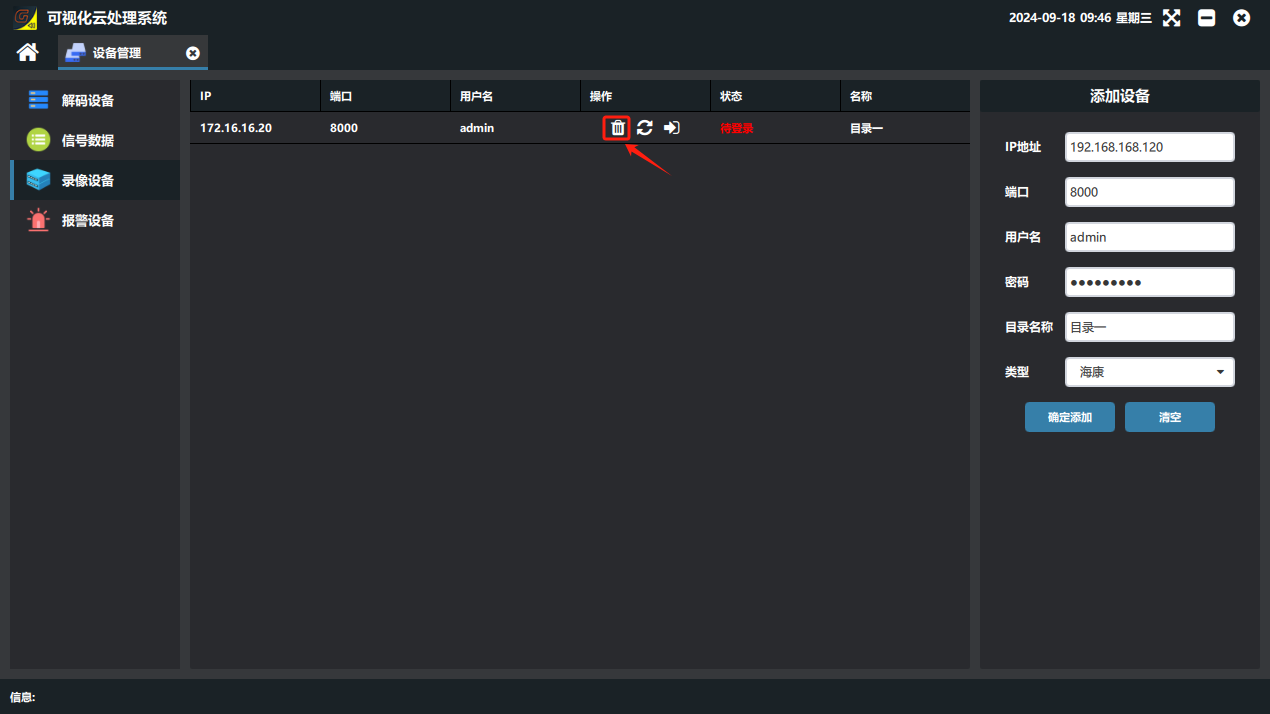
③ To delete a device, click the “” button in the Operation column.

2. Surveillance Viewing
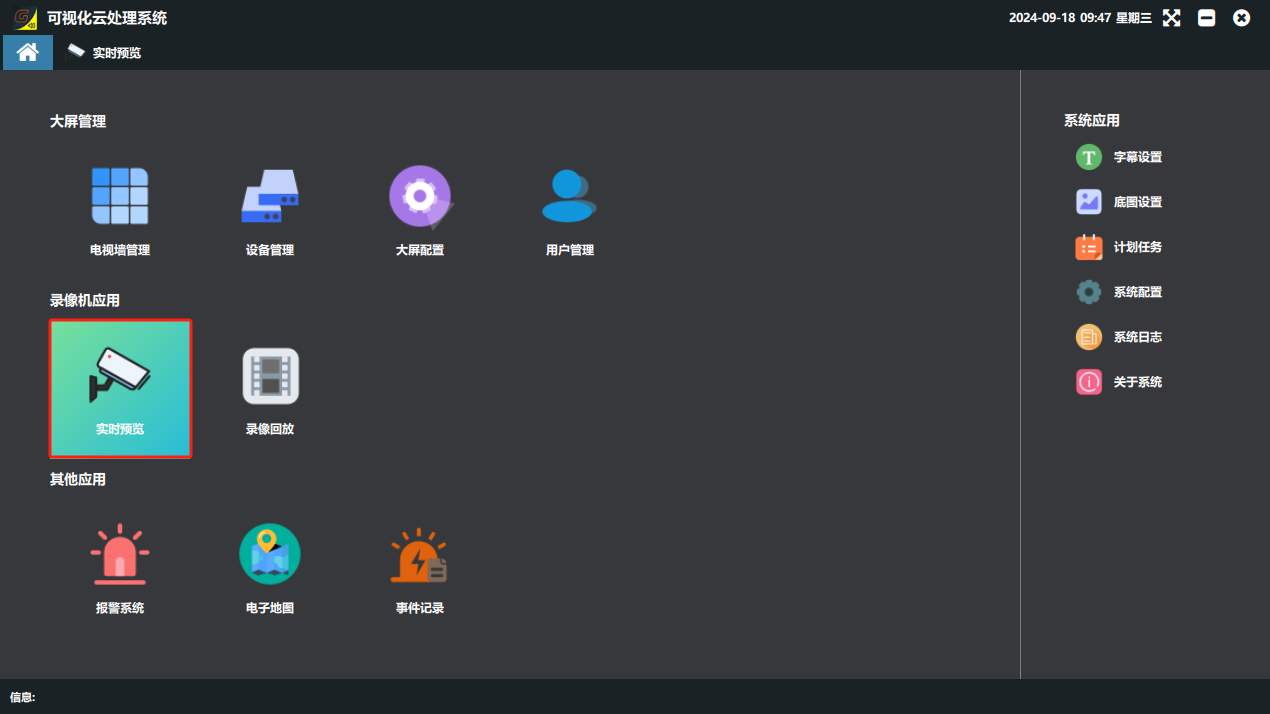
① Click the “Real-time Preview” button. (If the device list is empty, the NVR is not logged in: go to “Device Management”, click “Login”, and return to “Surveillance Viewing” once the Status column shows “Login Successful”; the signal source list then contains signal sources.)
② On the “Surveillance Viewing” page you can view the surveillance of the added NVRs. Select the grid layout of the viewing page, select the display cell and double-click a signal source to show its surveillance image. (Note: viewing surveillance images on the “Surveillance Viewing” page does not affect the image displayed on the video wall.)
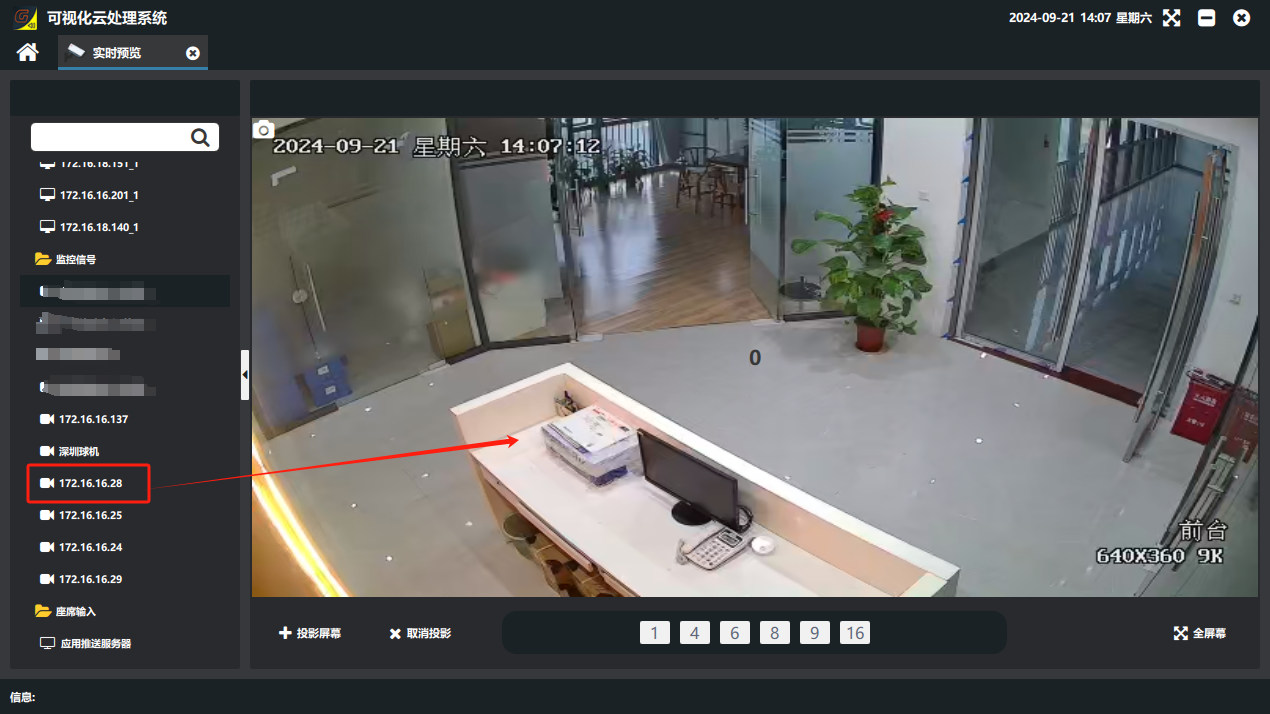
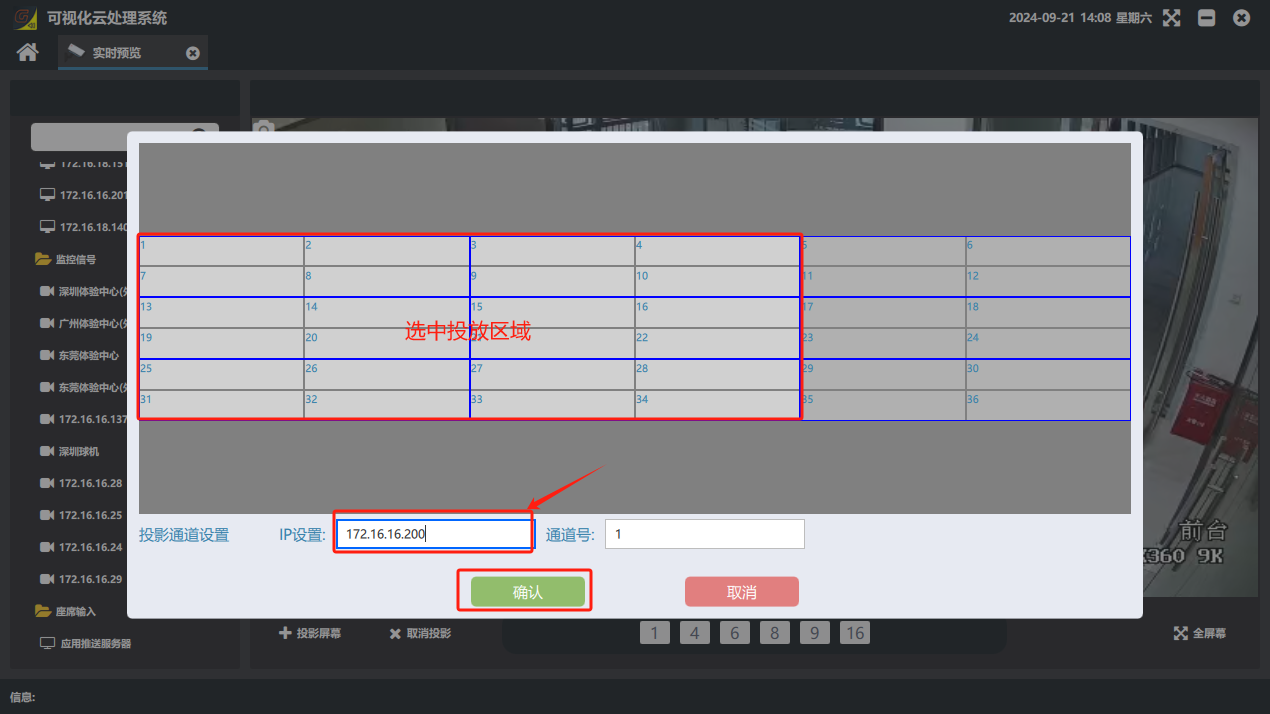
To put the page you are viewing on the video wall, click “Project Screen” → set the IP of the HDMI input board that the main control PC is connected to in the “IP Settings” field → select the projection display area → click “Confirm”. (If you do not need projection, click “Cancel Projection”.) Note: this function requires an HDMI cable from the PC to a device input port; the projection shows the PC screen.
3. Video Playback
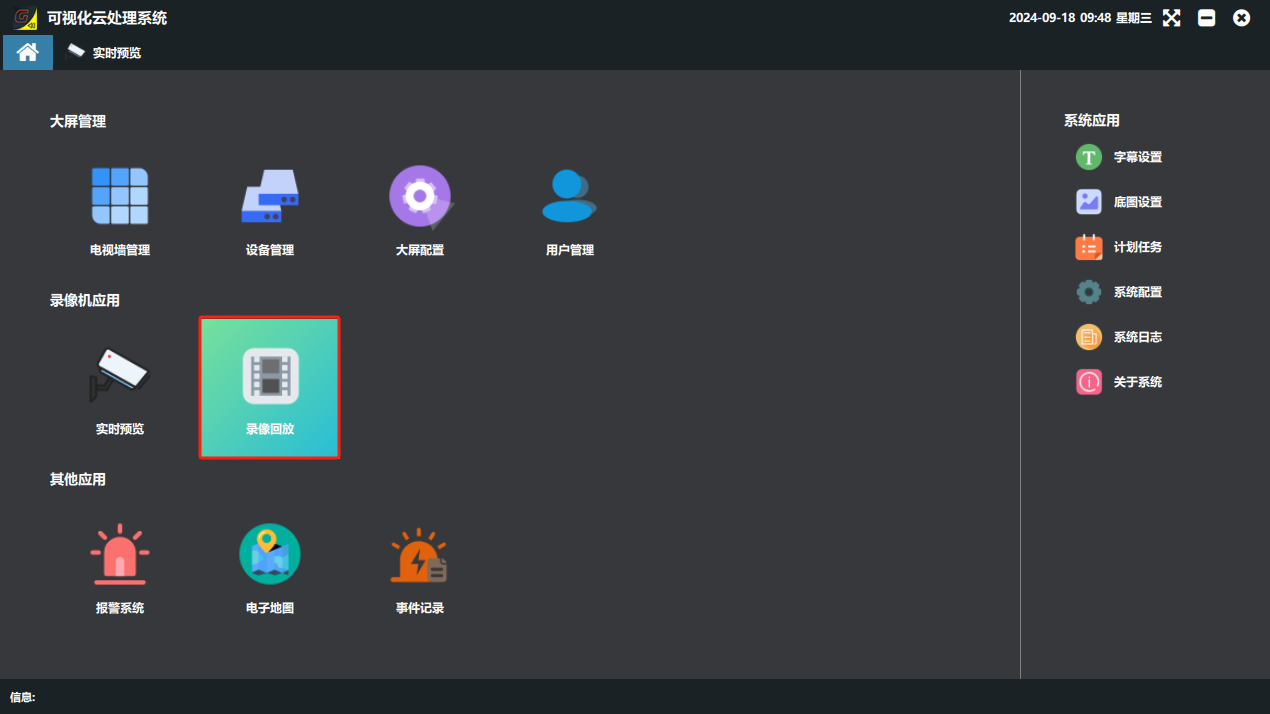
① Click the “Video Playback” button. (If the device list is empty, the NVR is not logged in: go to “Device Management”, click “Login”, and return to “Video Playback” once the Status column shows “Login Successful”; the signal source list then contains signal sources.)
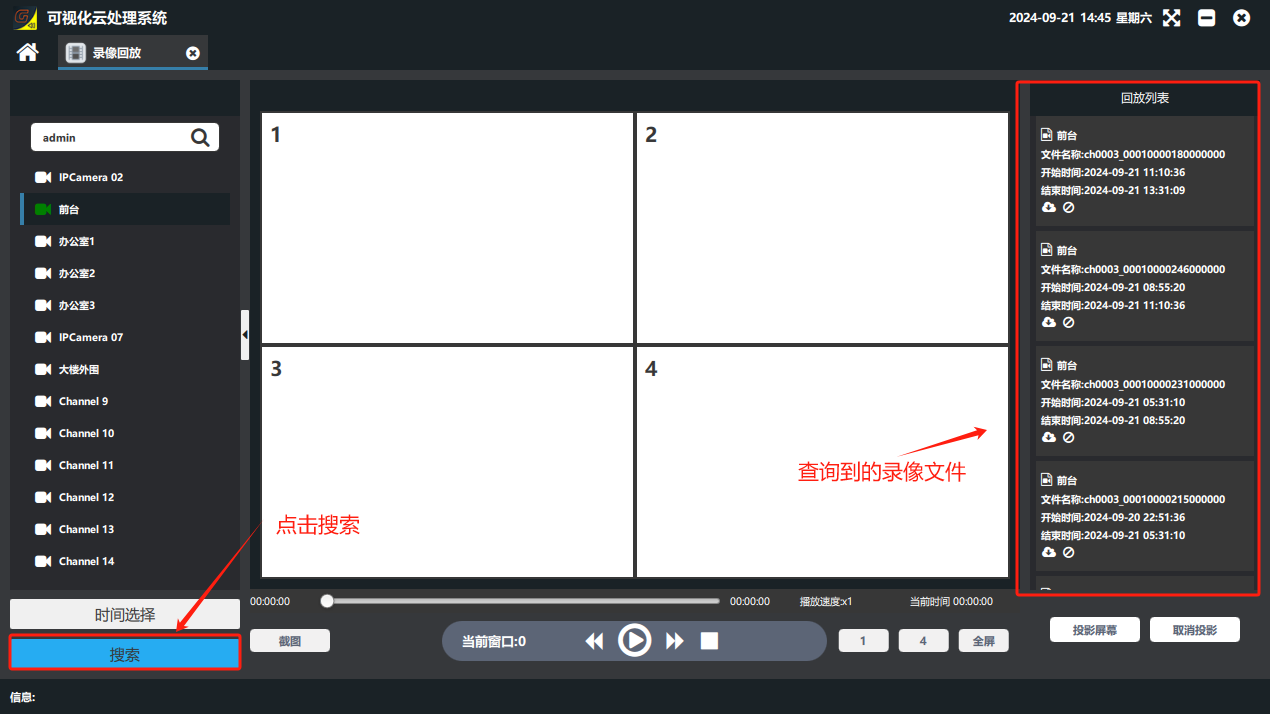
② On the “Video Playback” page, double-click the camera to view → click “Time Selection” to choose the time range → click “Search” → select the playback display cell → double-click the recording file to play, and the playback is displayed.
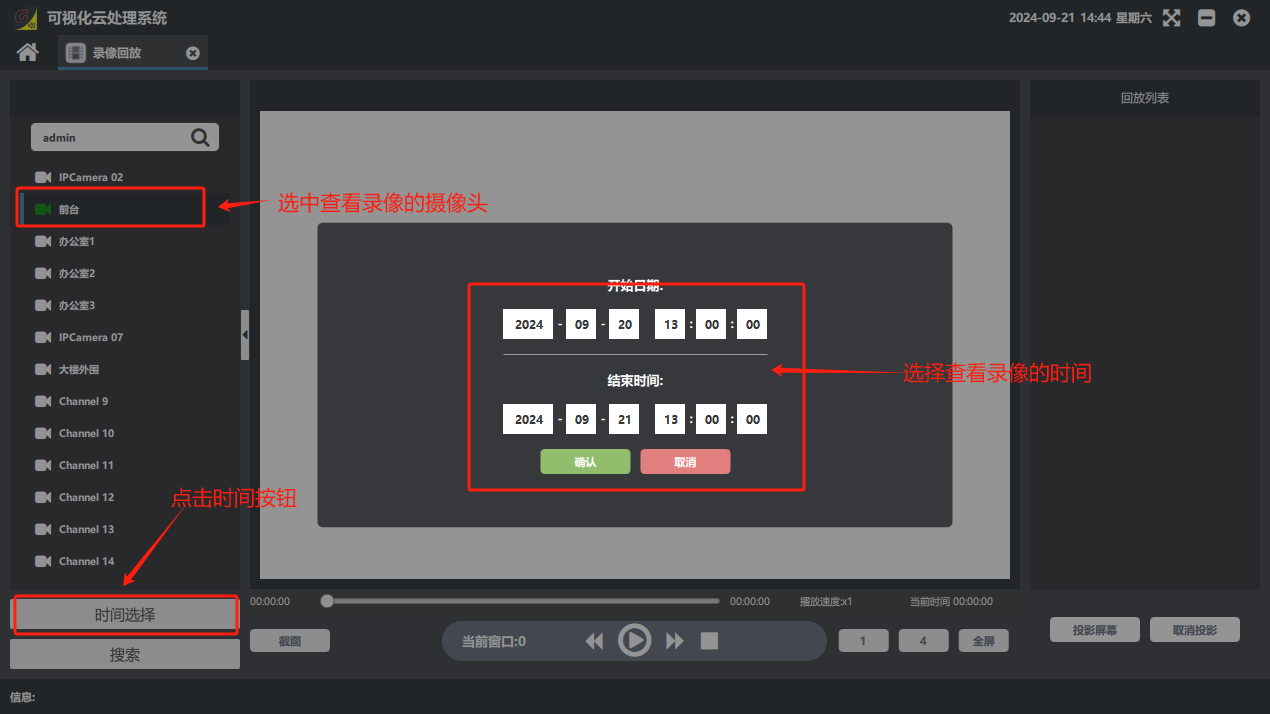
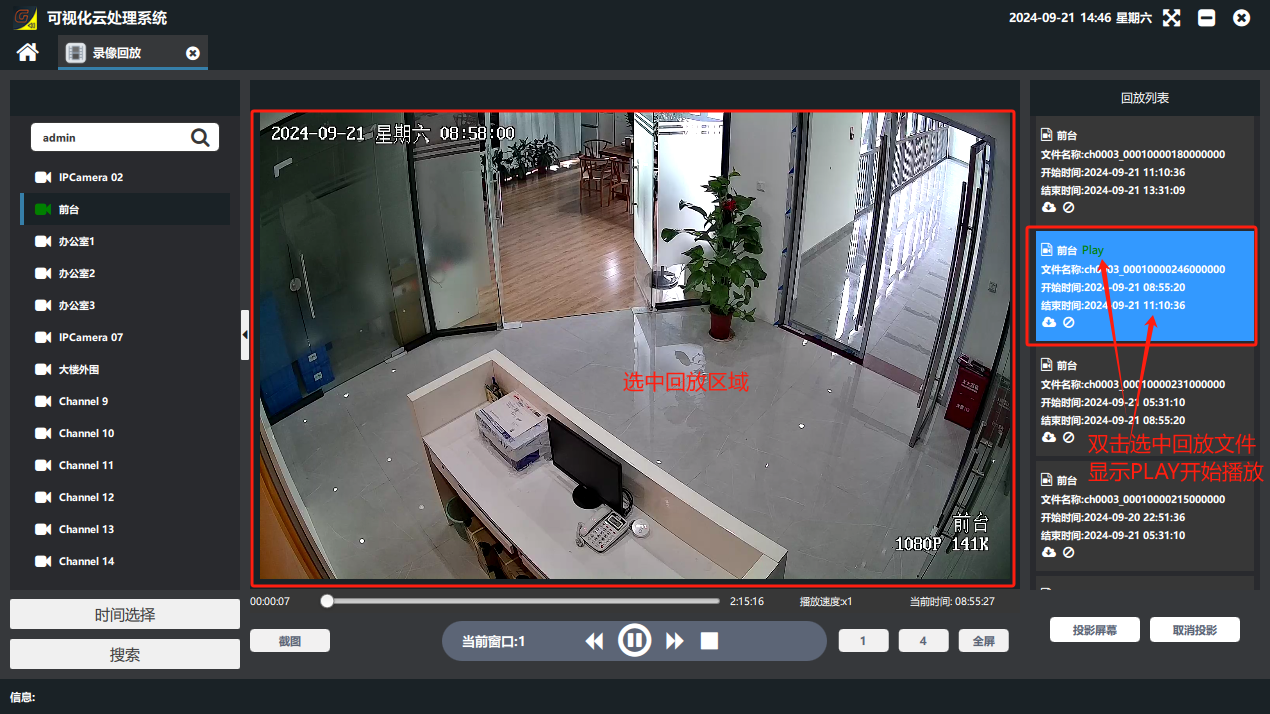
③ To put the playback page you are viewing on the video wall, click “Project Screen” → set the IP of the HDMI input board that the main control PC is connected to in the “IP Settings” field → select the projection display area → click “Confirm”. (If you do not need projection, click “Cancel Projection”.)
Did this page help you?One line of feedback helps us keep the steps accurate.