Documentation
Getting Started
Devices and Assets
Publishing and Display
Scenes and Patrol
Management and Settings
Troubleshooting and Support
Uploading Assets
1. Upload video assets
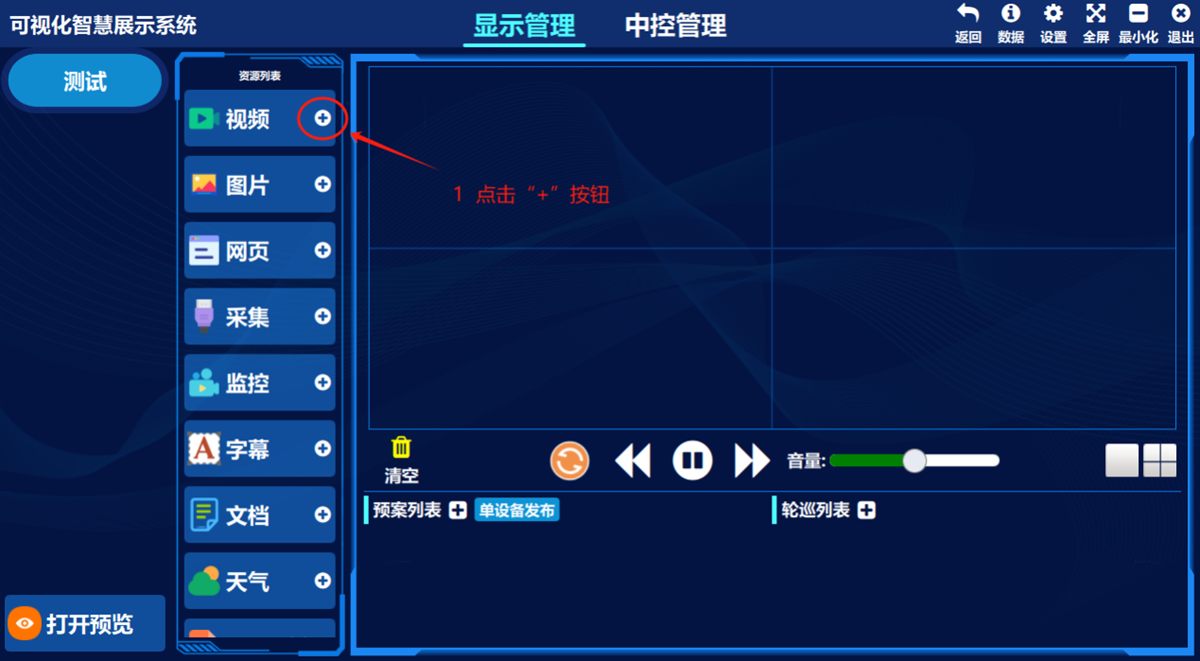
- ① Click the add button for 视频(Video)
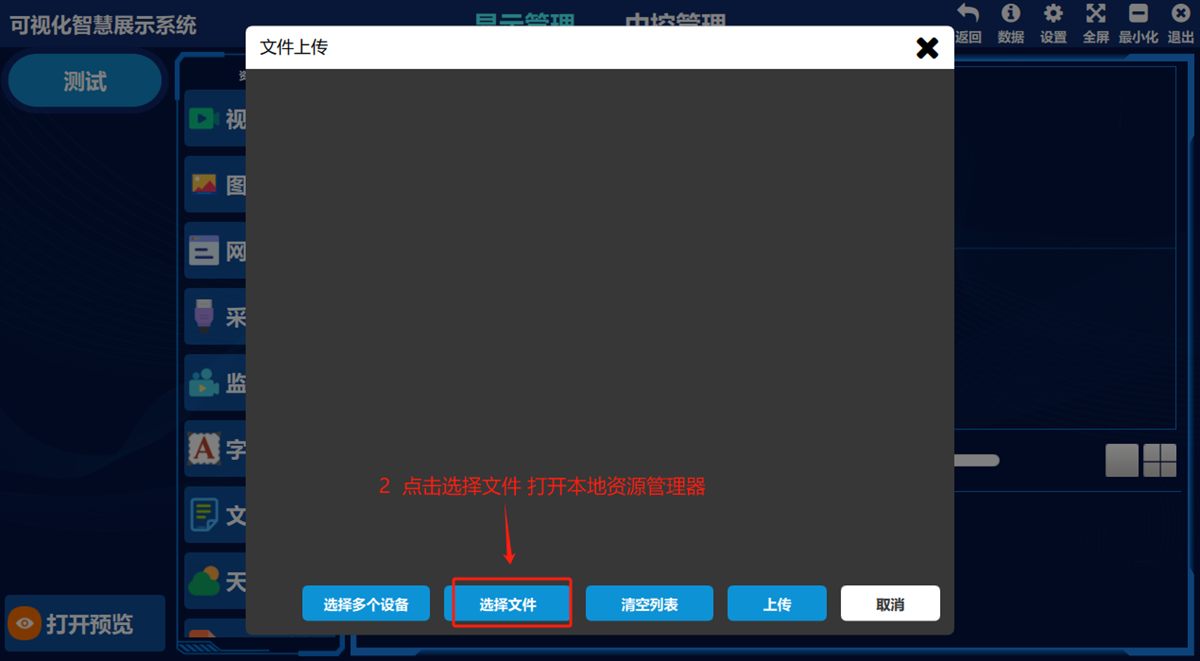
- ② Click 选择文件(Choose File)
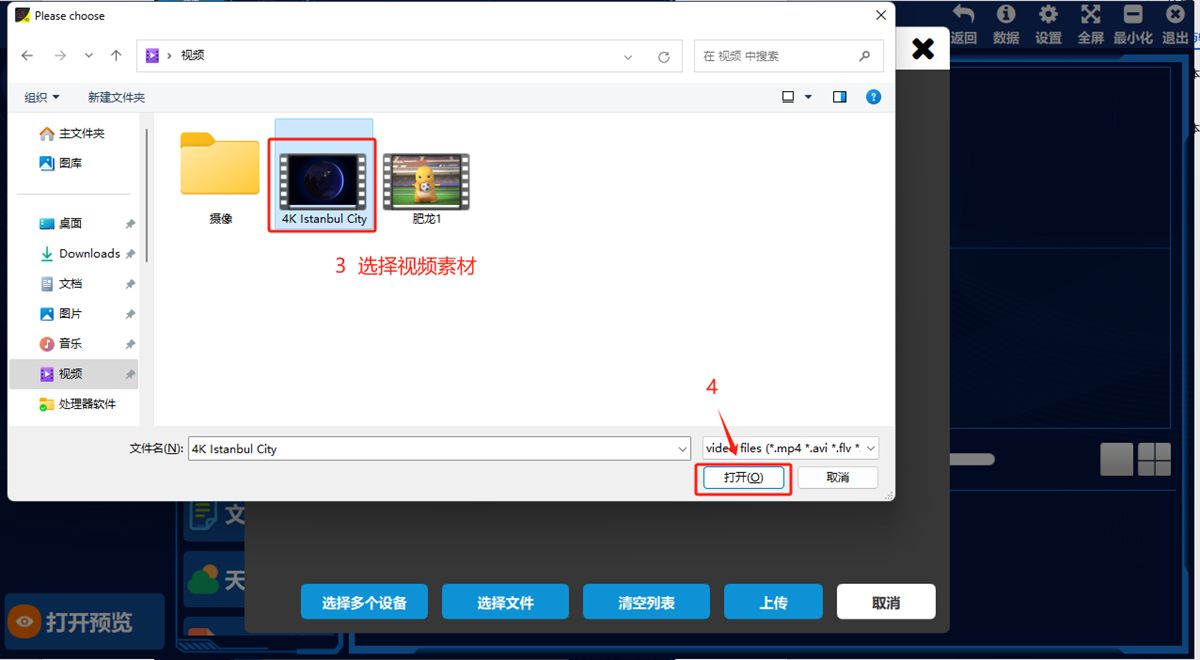
- ③ Select the video asset, ④ click 打开(Open)
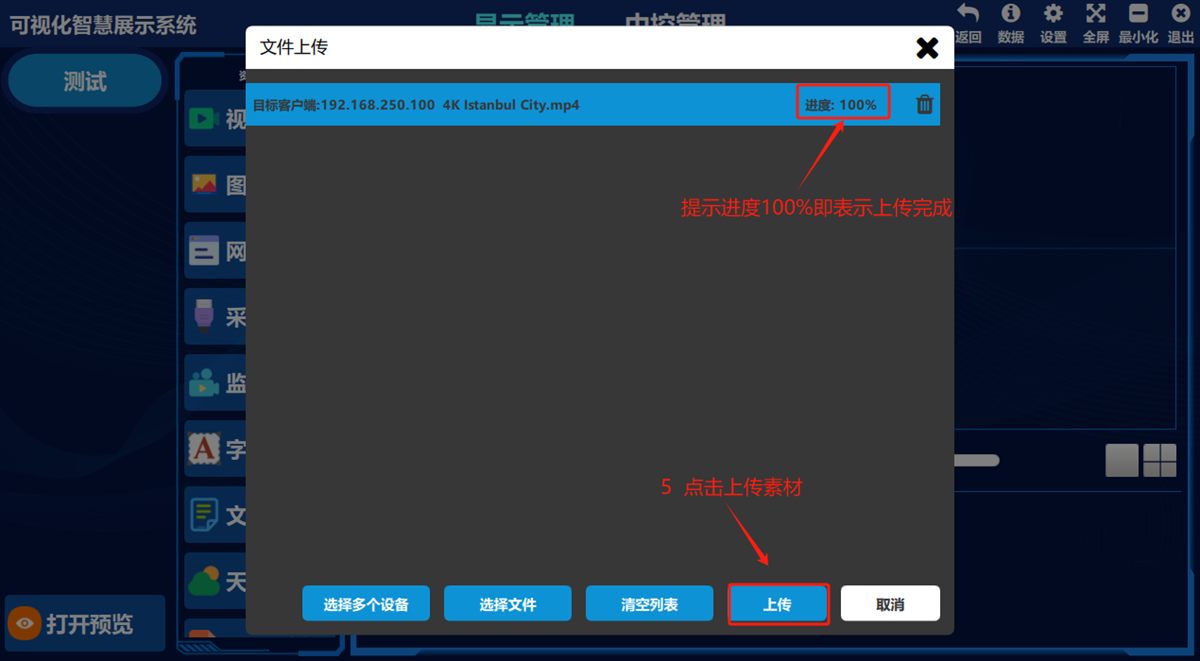
- ⑤ Click 上传(Upload), ⑥ a progress of 100% means the upload succeeded, ⑦ close the window
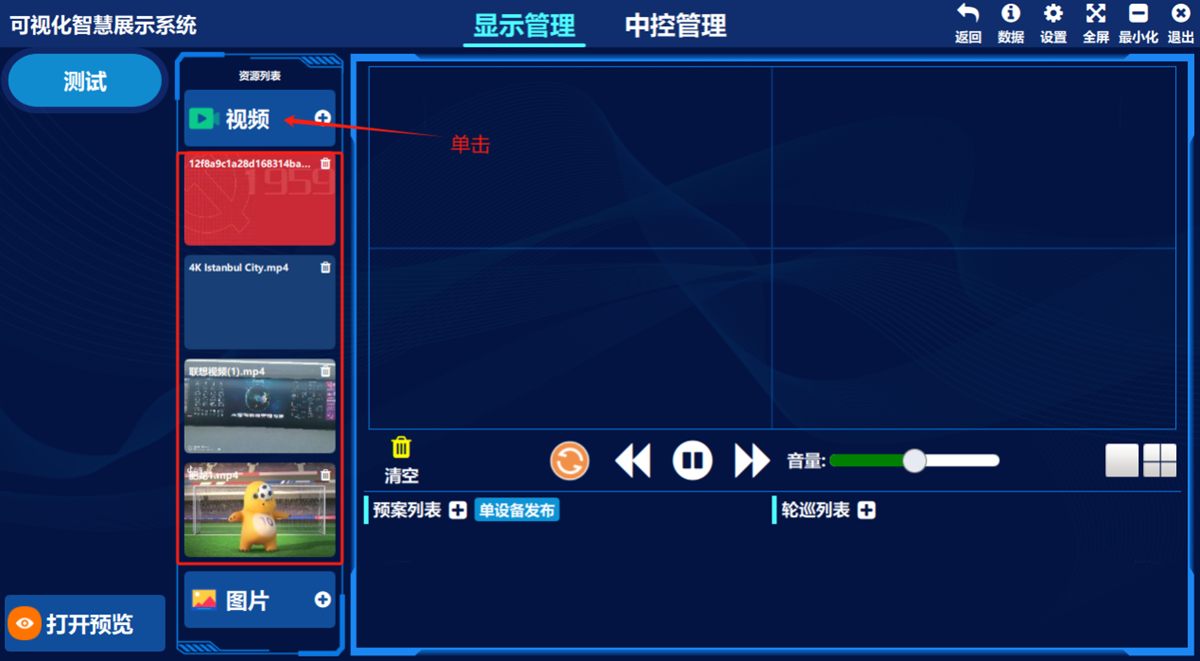
Click 视频(Video) in the left-hand asset list and the video you just uploaded appears in the preview pane below.
2. Upload image assets
- ① Click the add button for 图片(Image)
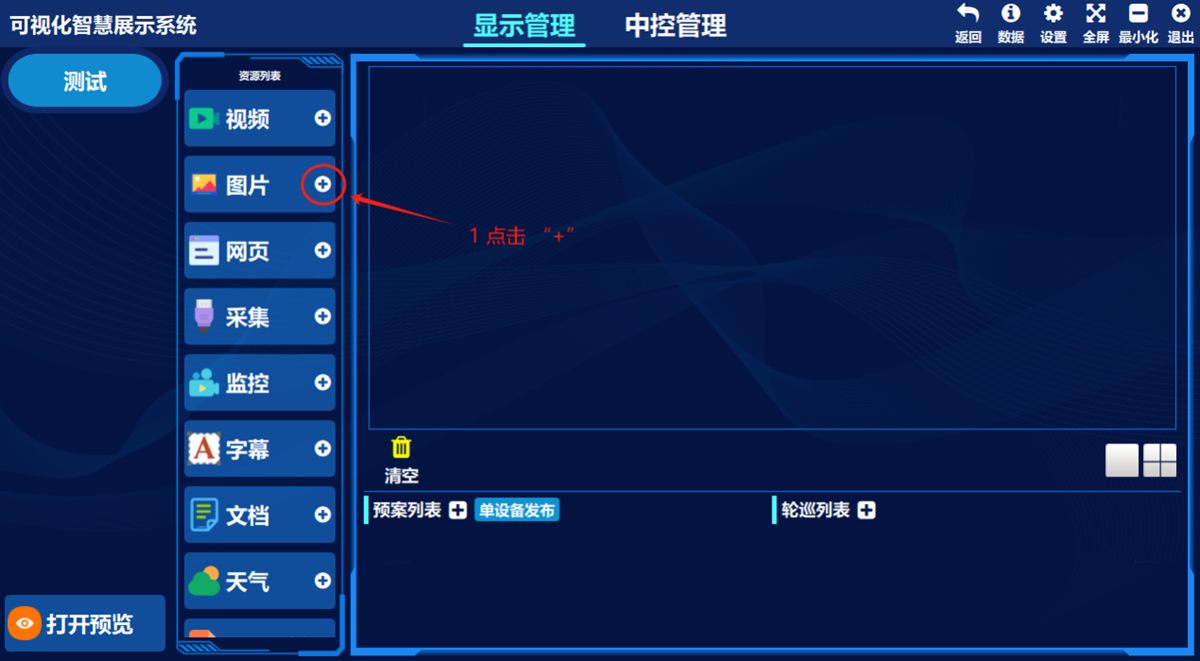
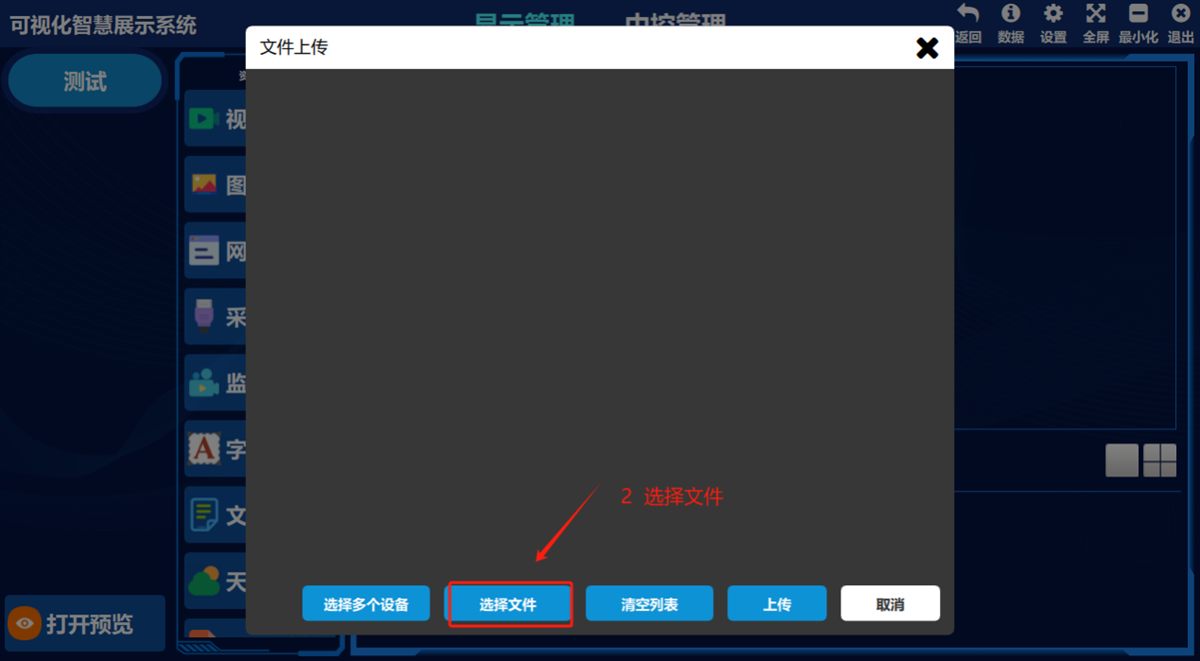
- ② Click Choose File
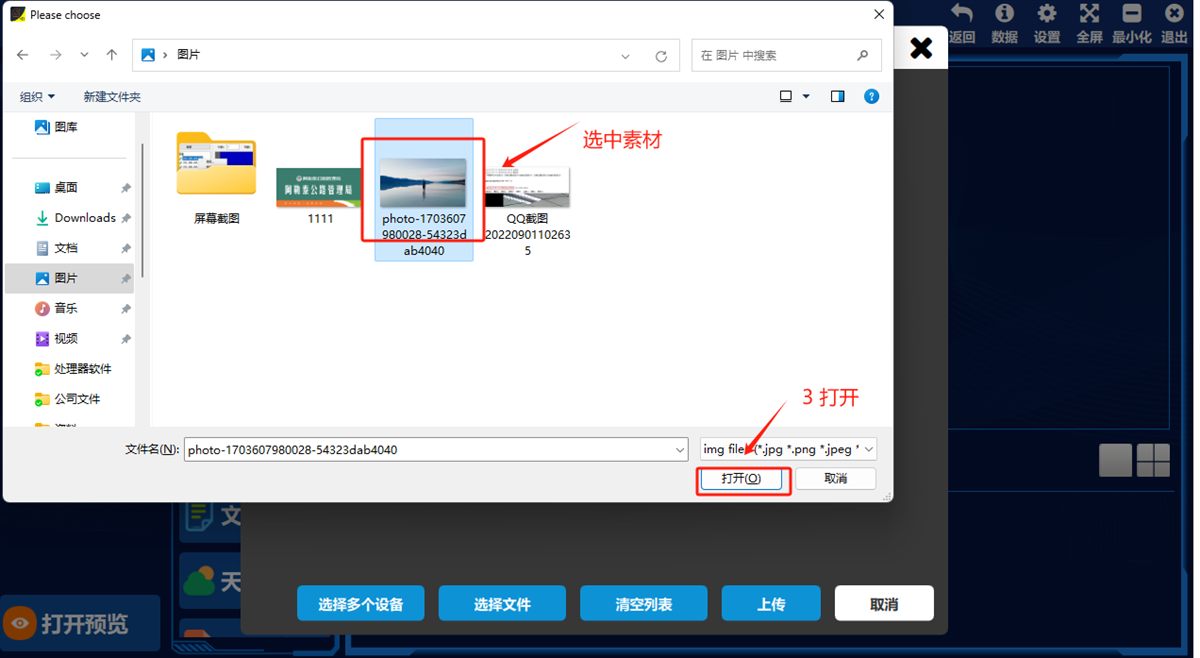
- ③ Select the image asset, ④ click Open
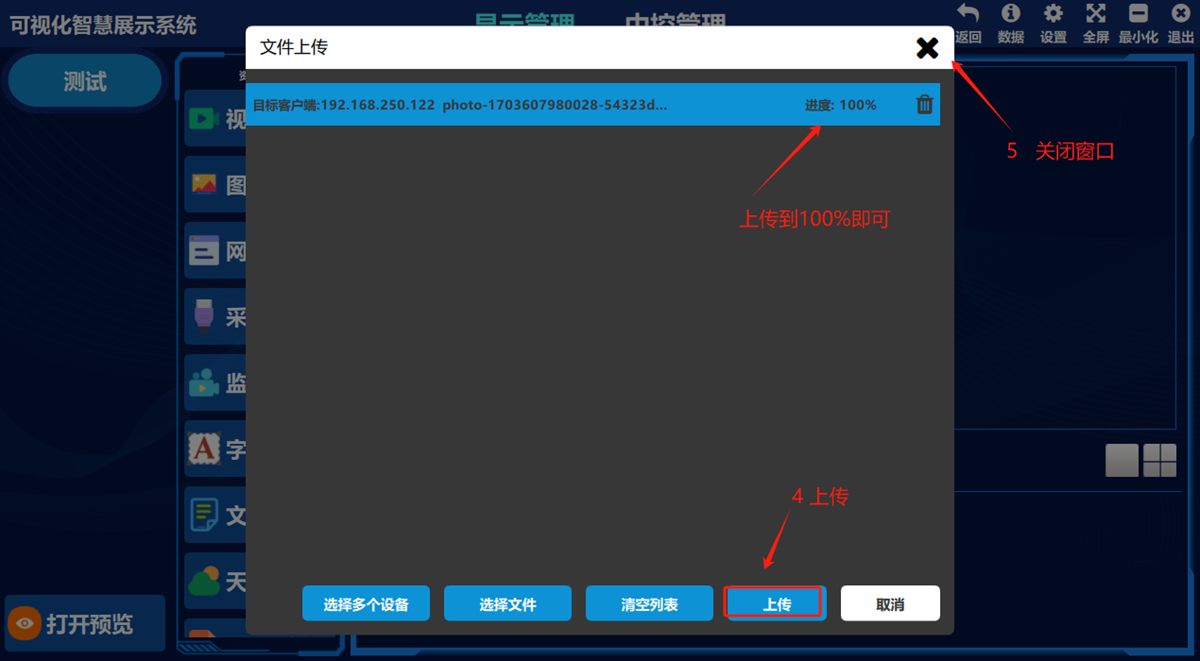
- ⑤ Click Upload, ⑥ a progress of 100% means the upload succeeded, ⑦ close the window
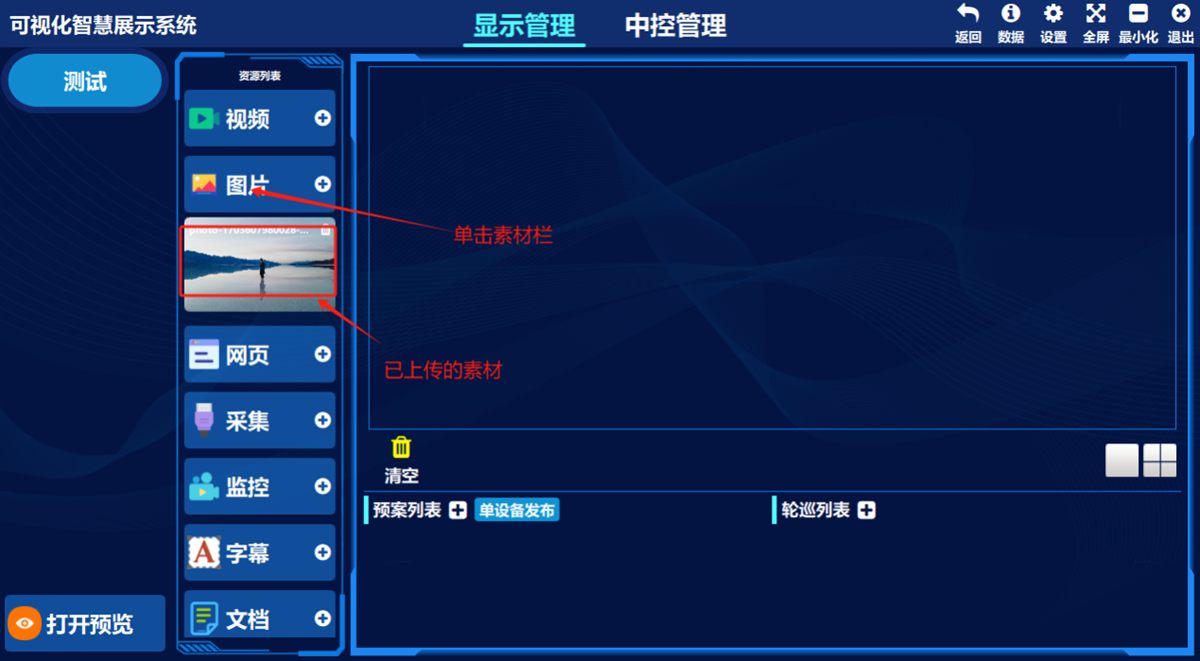
Click 图片(Image) in the left-hand asset list and the image you just uploaded appears in the preview pane below.
3. Add a web page
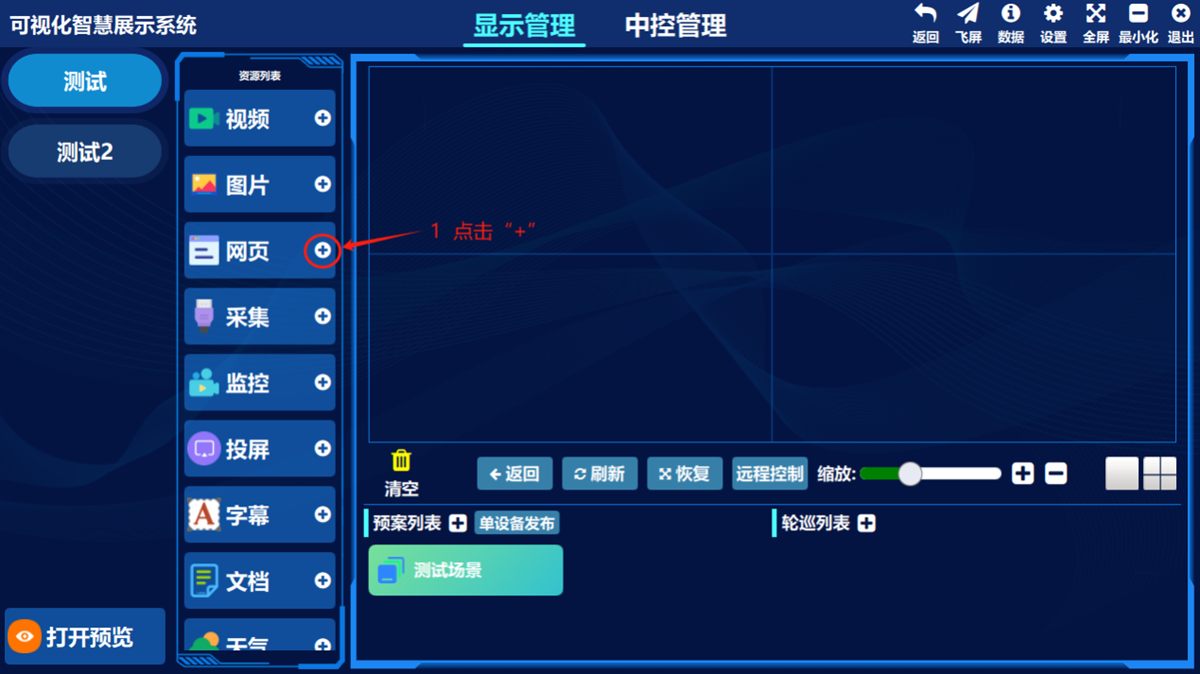
- ① Click the add button for 网页(Web Page)
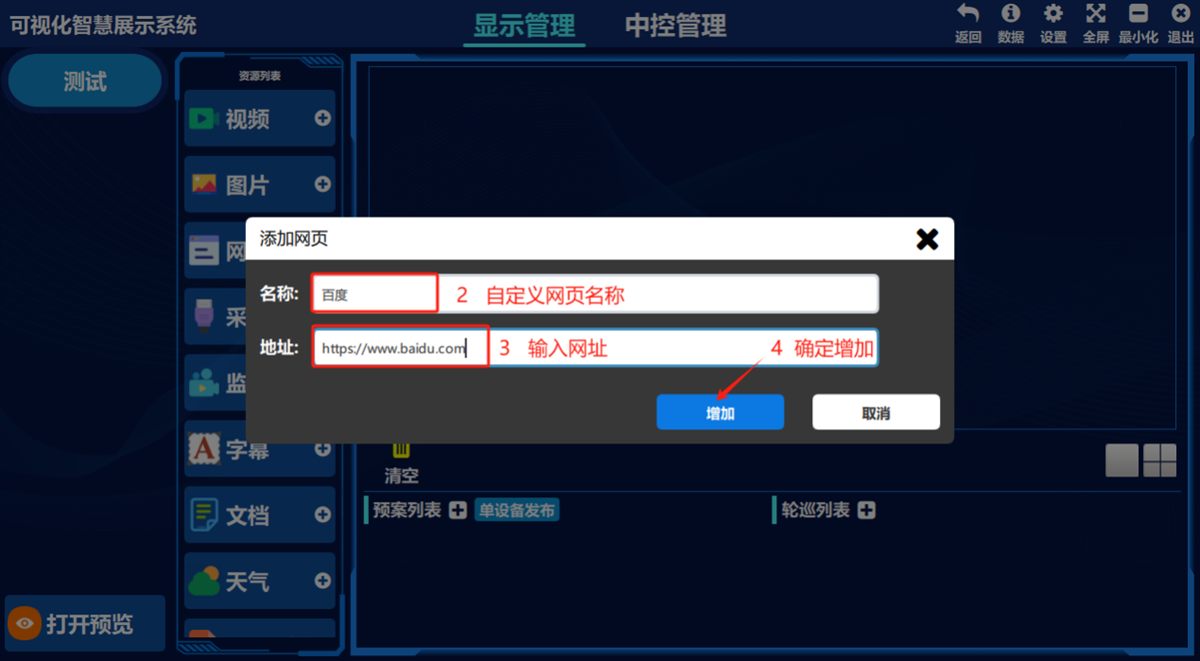
- ② Enter a name of your choice, ③ enter the URL (the URL must start with http:// or https://)
Click 增加(Add)
Click 网页(Web Page) in the left-hand asset list and the web page you just added appears in the preview pane below.
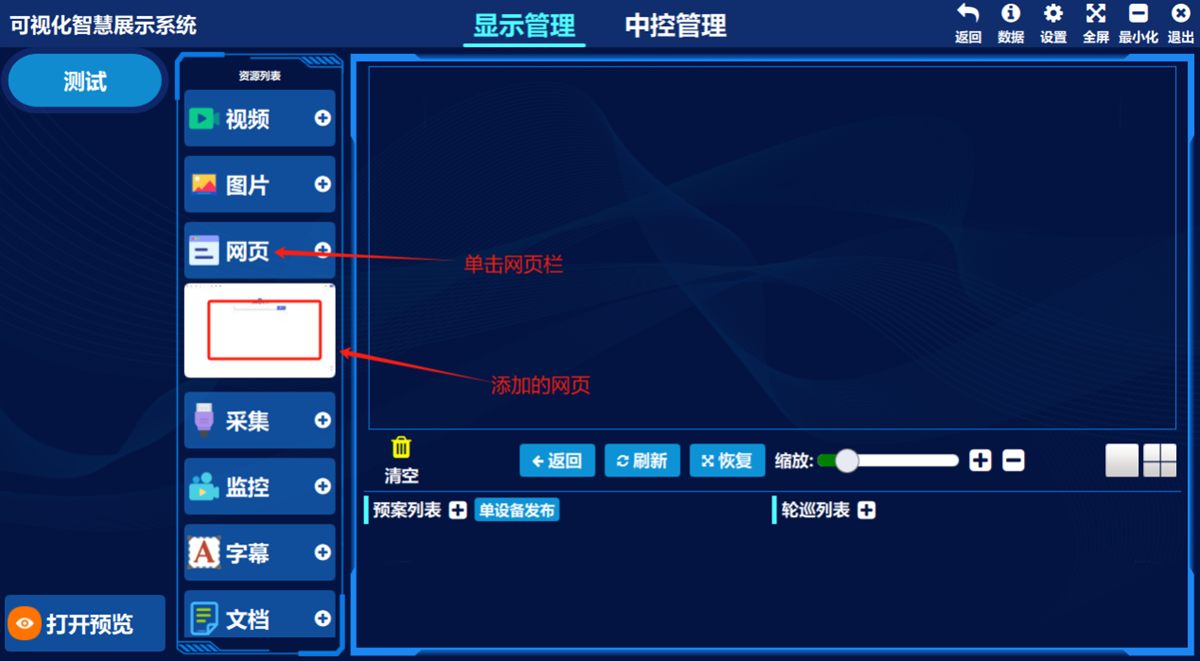
4. Capture HD input signals (requires an input node)
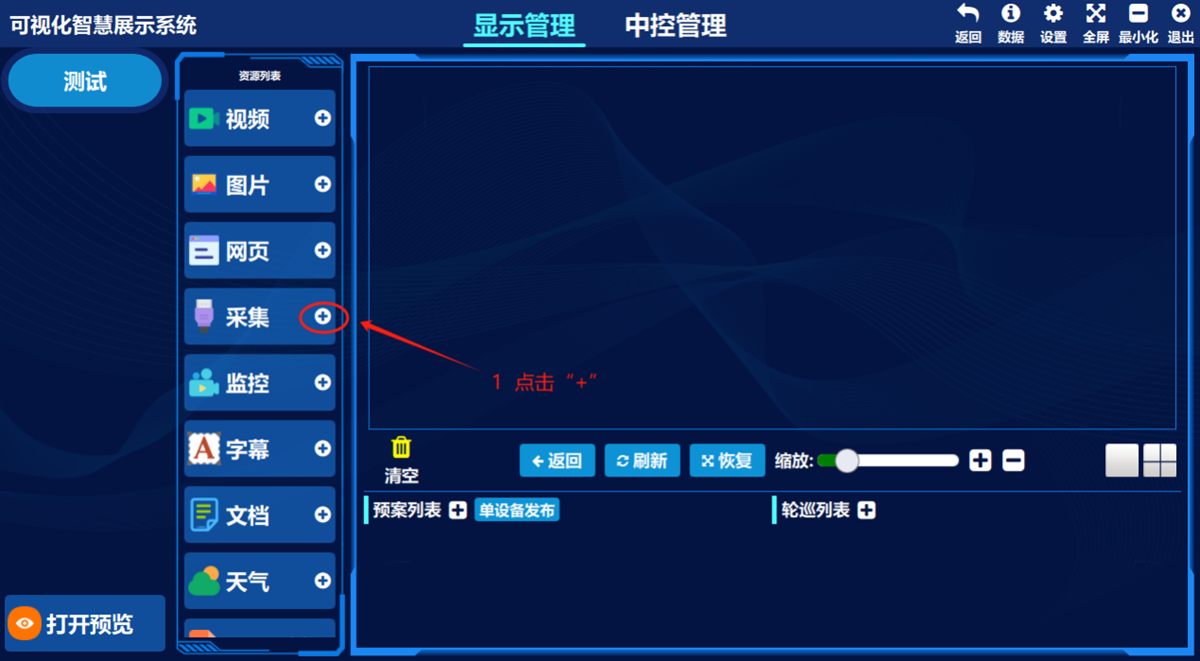
- ① Click the add button for 采集源(Capture Source)
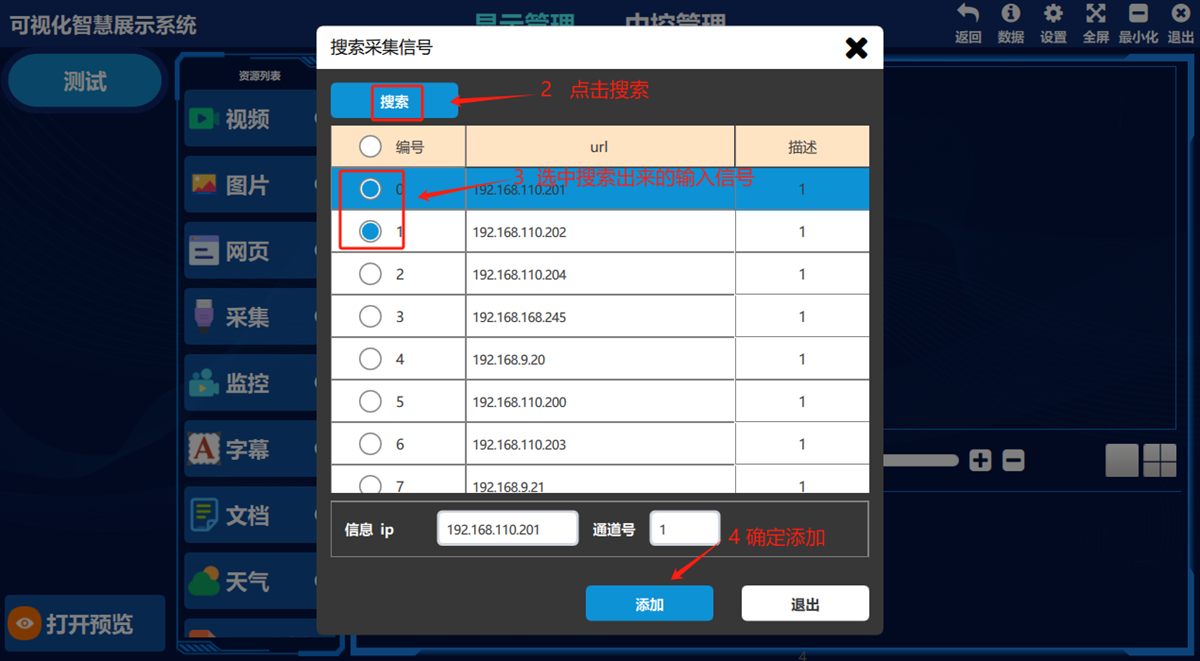
- ② Click 搜索(Search), ③ select the HD input source after the search, ④ click 添加(Add)
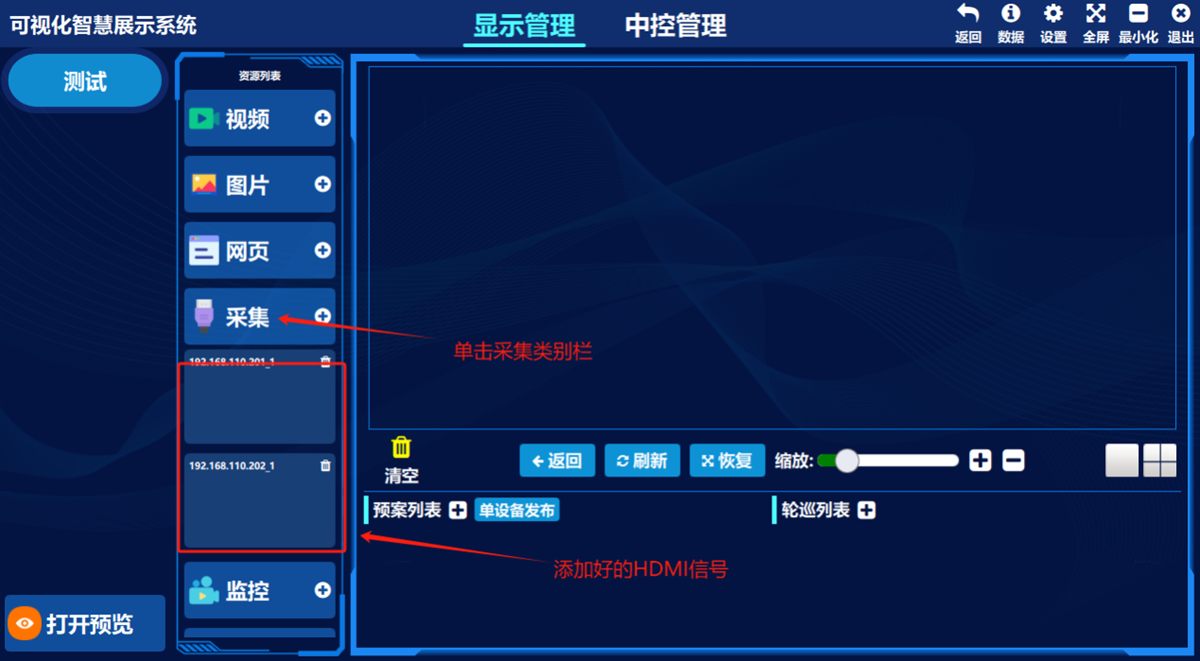
Click 采集信号(Captured Signal) in the left-hand asset list and the HDMI signal you just added appears in the preview pane below.
5. Add camera signals
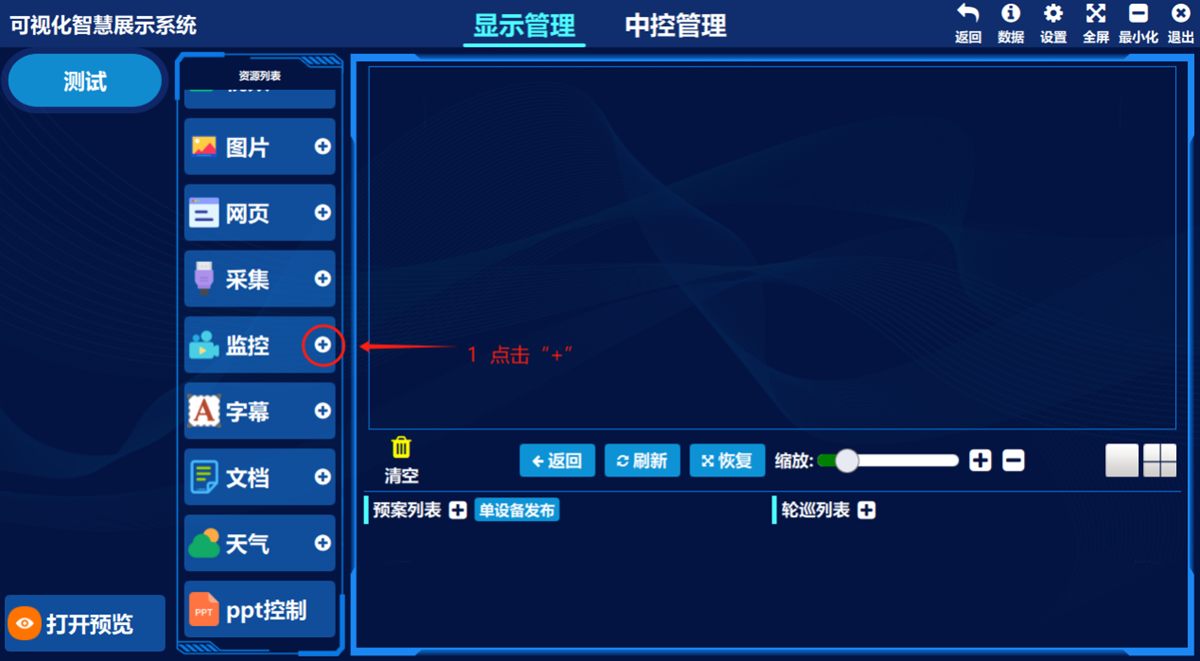
- ① Click the add button for 摄像头(Camera)
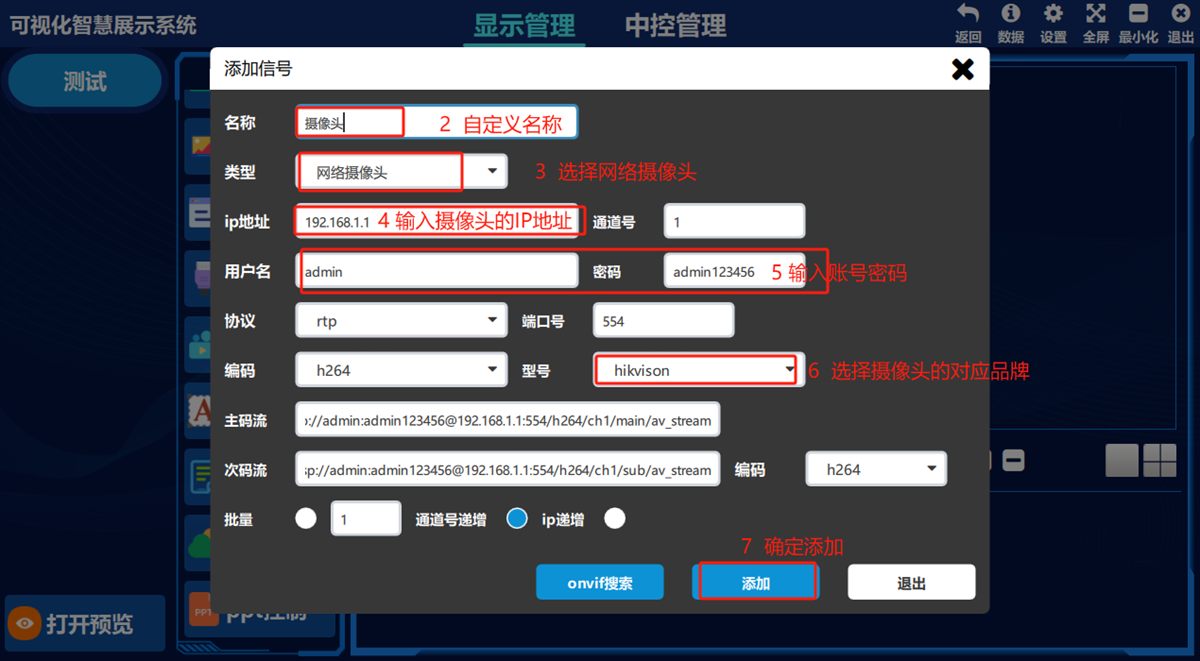
- ② Set a custom camera name, ③ select 网络摄像头(Network Camera), ④ enter the camera IP, ⑤ enter the camera account and password, ⑥ select the camera model, ⑦ click Add
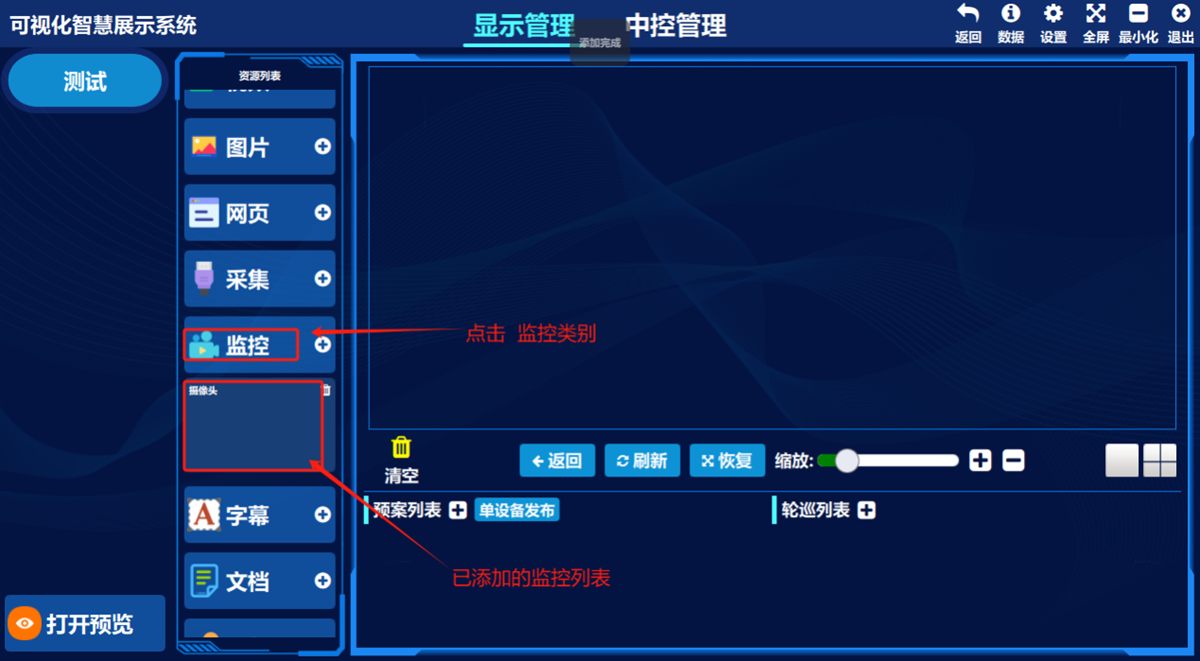
Click 监控(Surveillance) in the left-hand asset list and the surveillance signal you just added appears in the preview pane below.
6. Subtitle settings
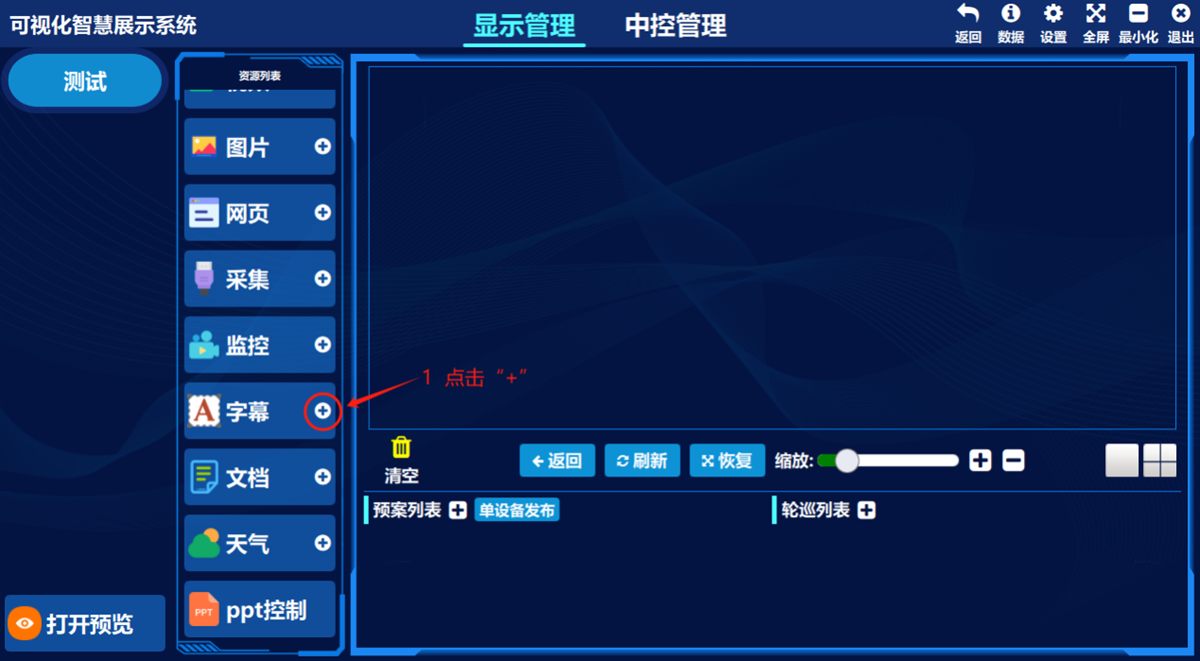
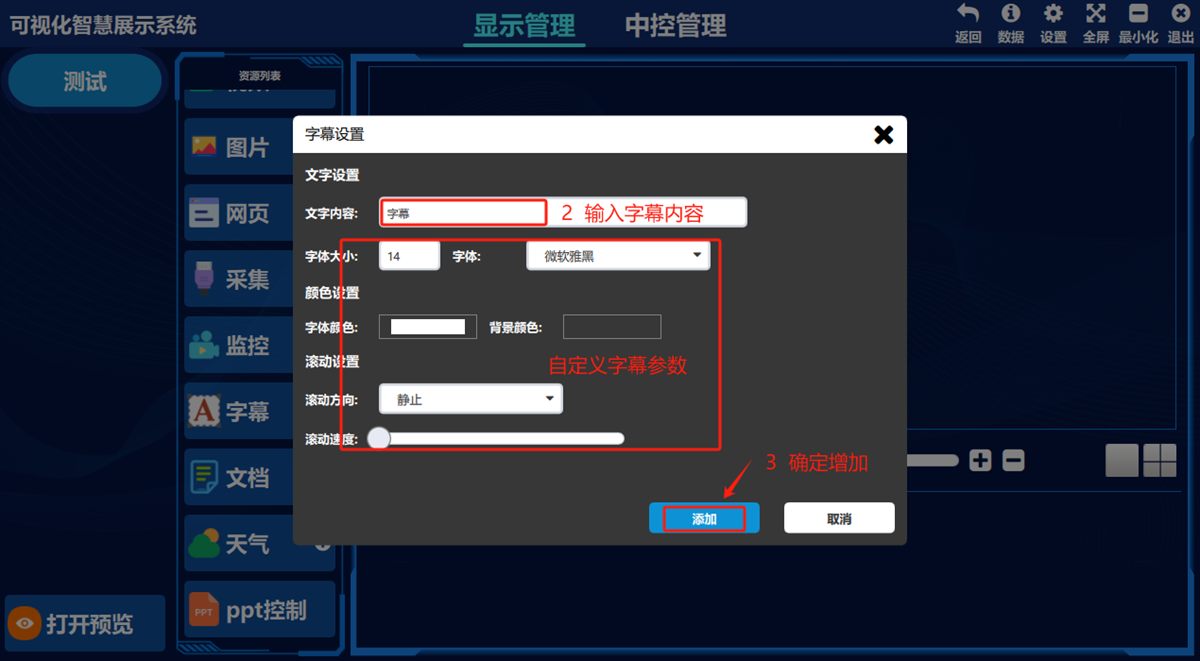
- ① Click the add button for 字幕(Subtitle)
- ② Enter the subtitle text, choose the text settings, ③ click 添加(Add)
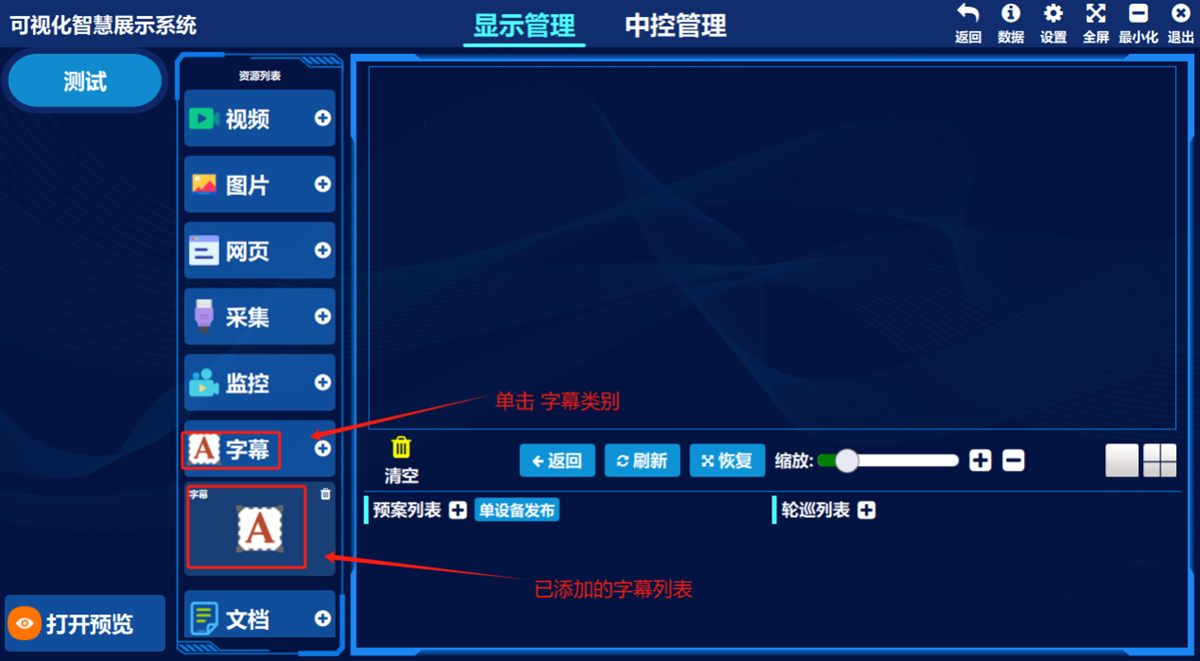
Click 字幕(Subtitle) in the left-hand asset list and the subtitle you just added appears in the preview pane below.
7. Upload documents
The software installation path must not contain Chinese characters, otherwise publishing fails.
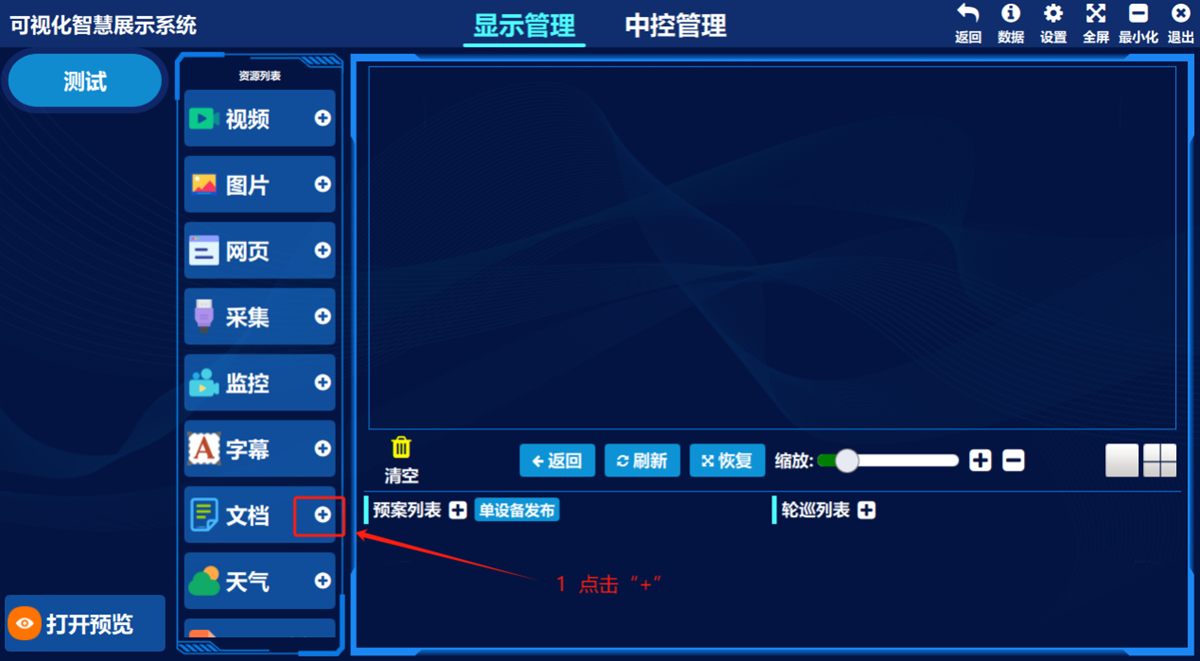
- ① Click the add button for 文档(Document)
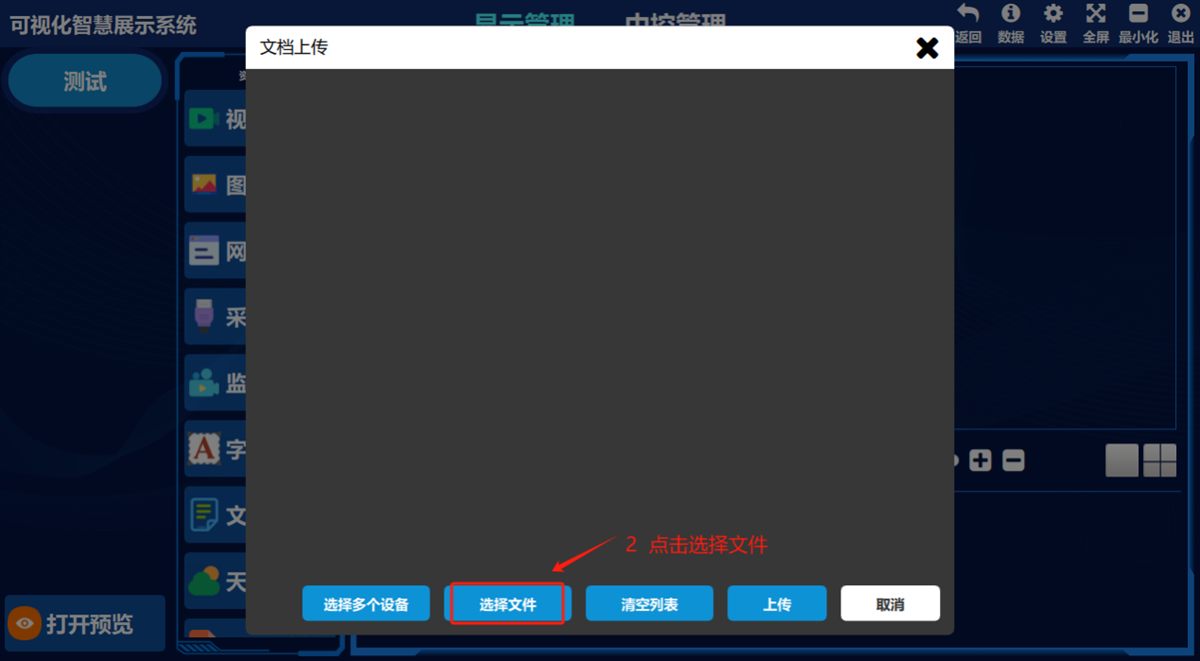
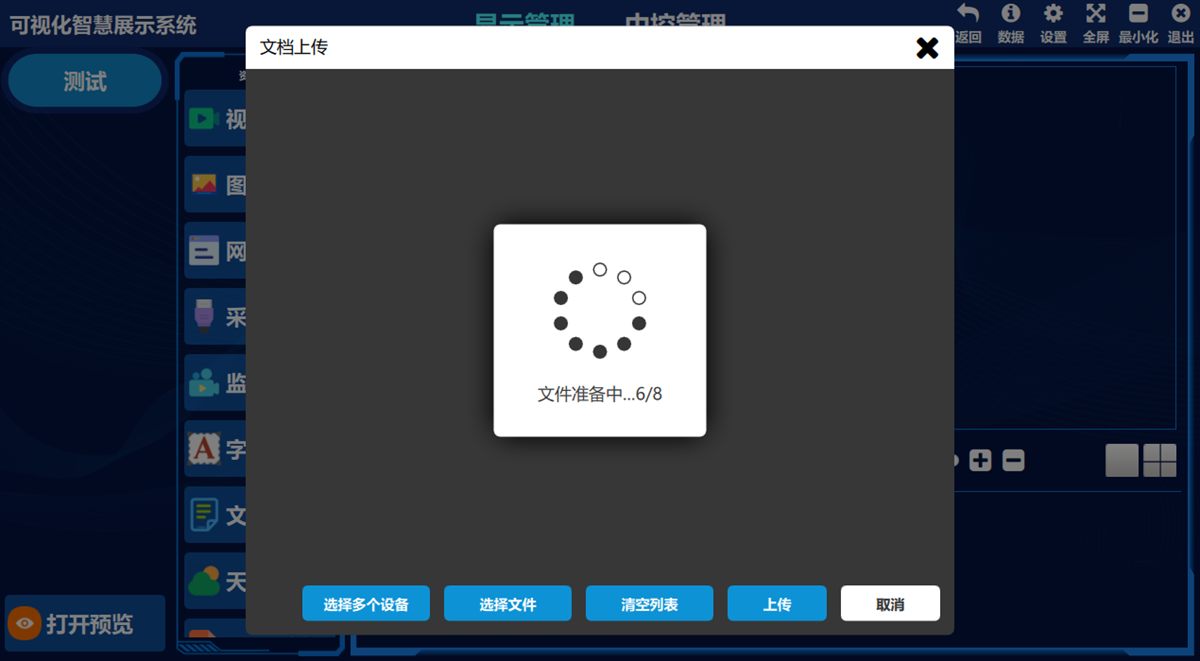
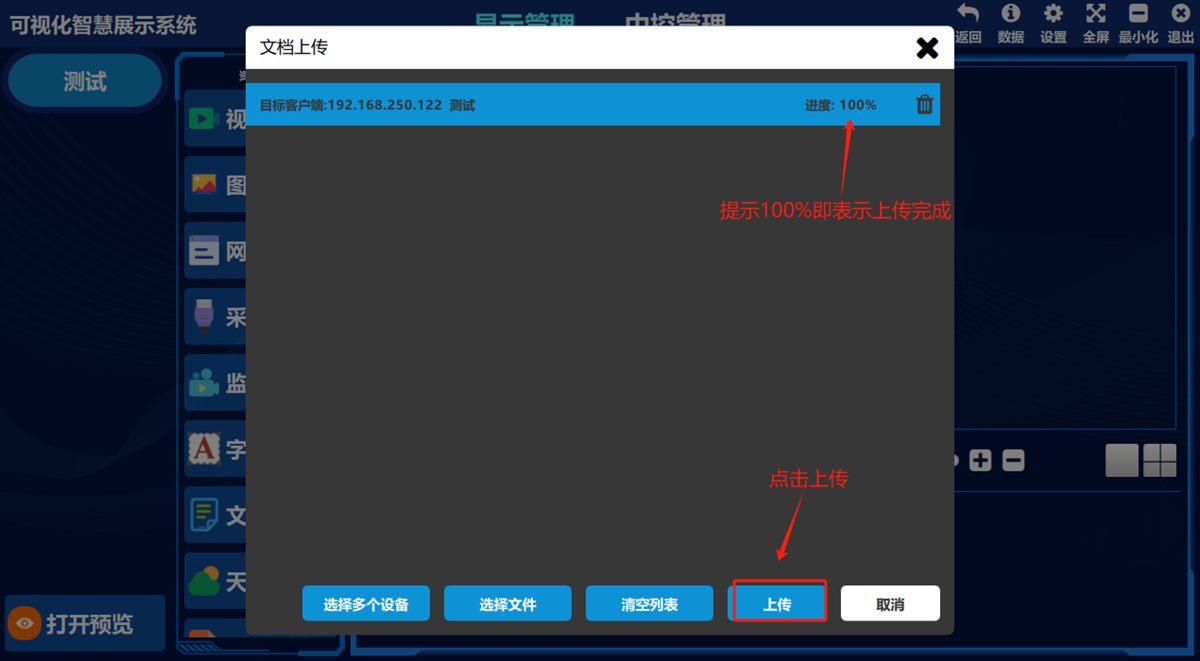
- ② Click Choose File, ③ select the document asset, ④ click Open, ⑤ click Upload, ⑥ a progress of 100% means the upload succeeded, ⑦ close the window
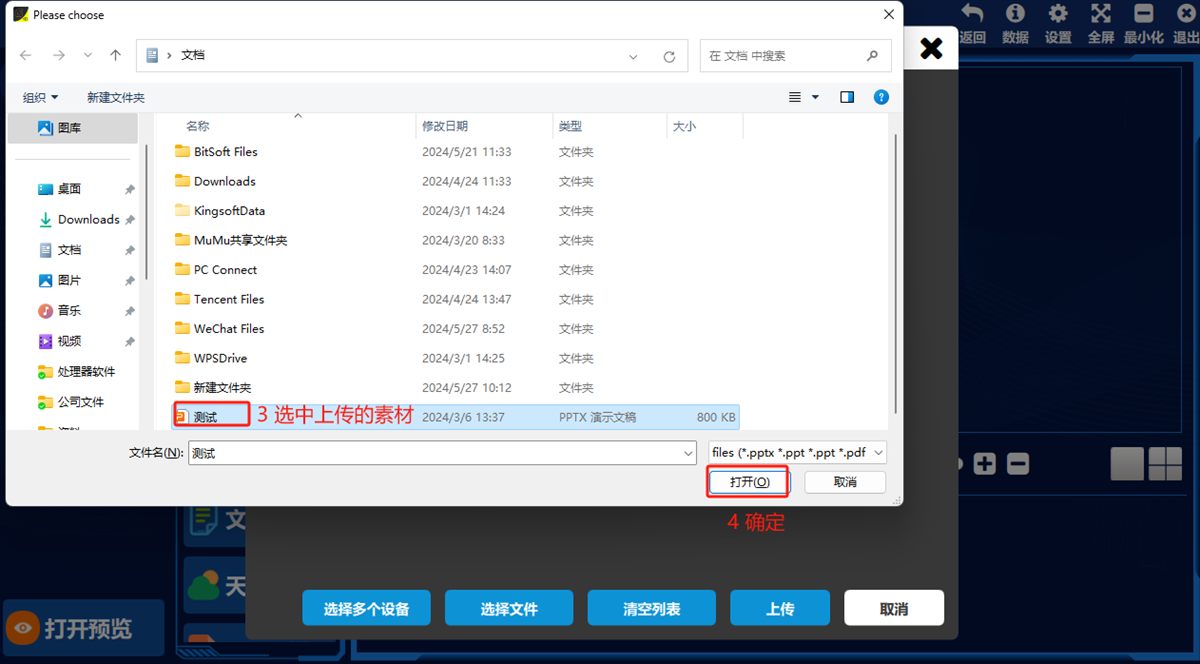
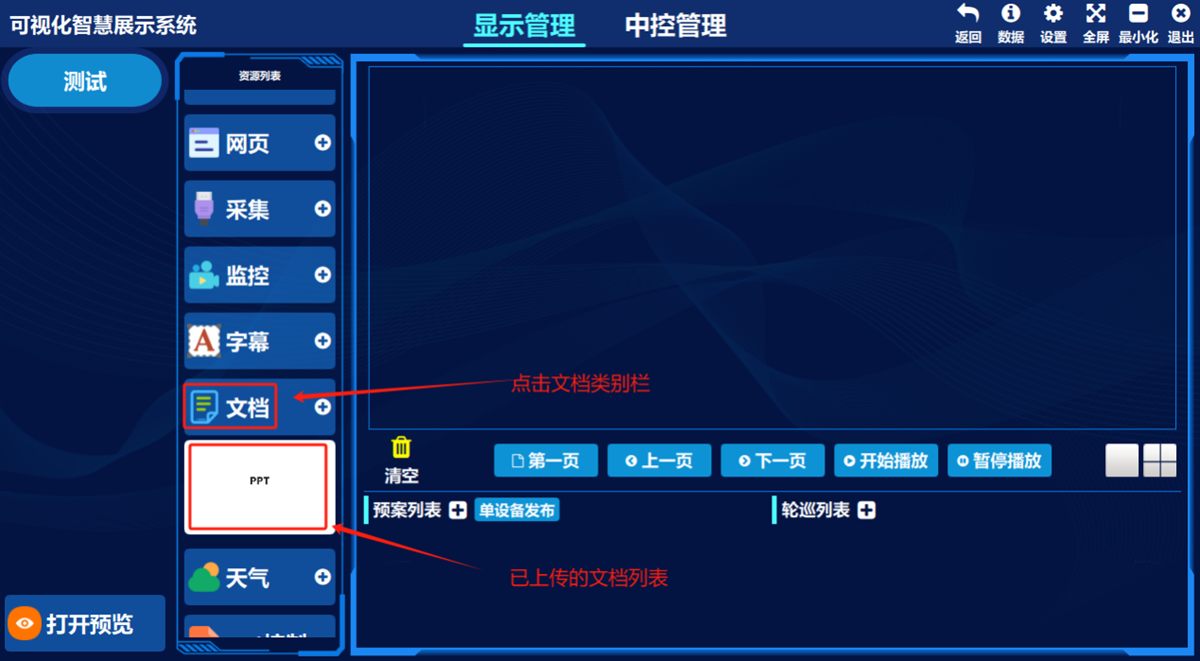
Click 文档(Document) in the left-hand asset list and the document you just uploaded appears in the preview pane below.
8. Add a weather widget
- ① Click the add button for 天气(Weather)
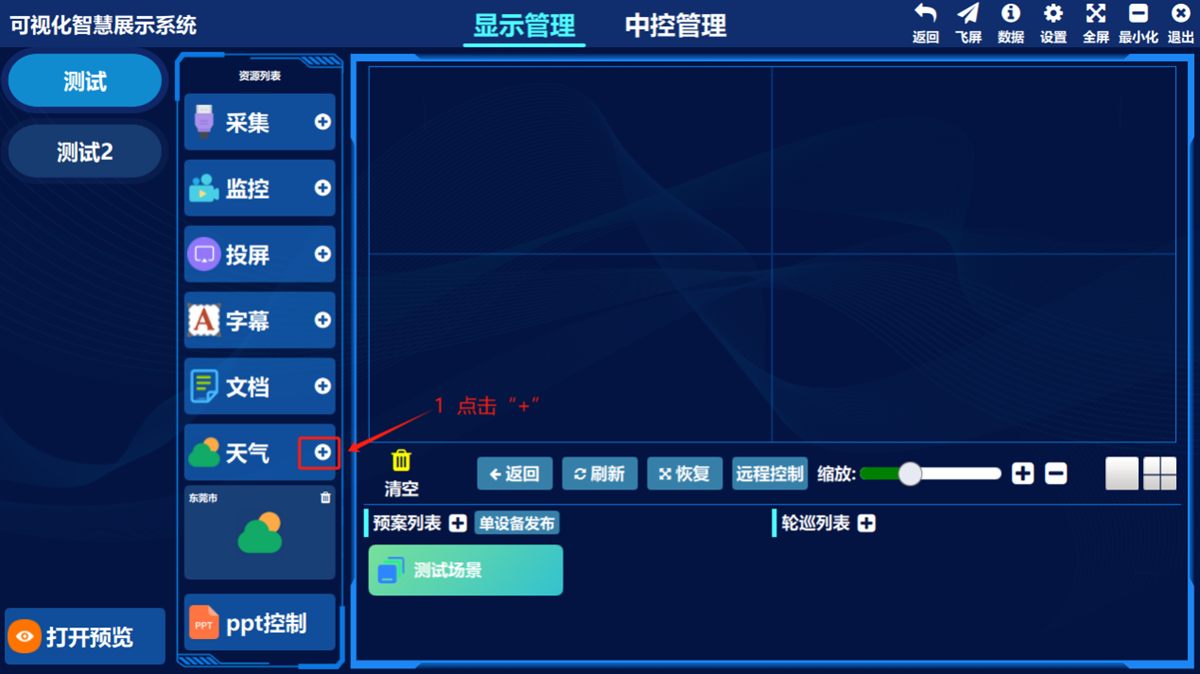
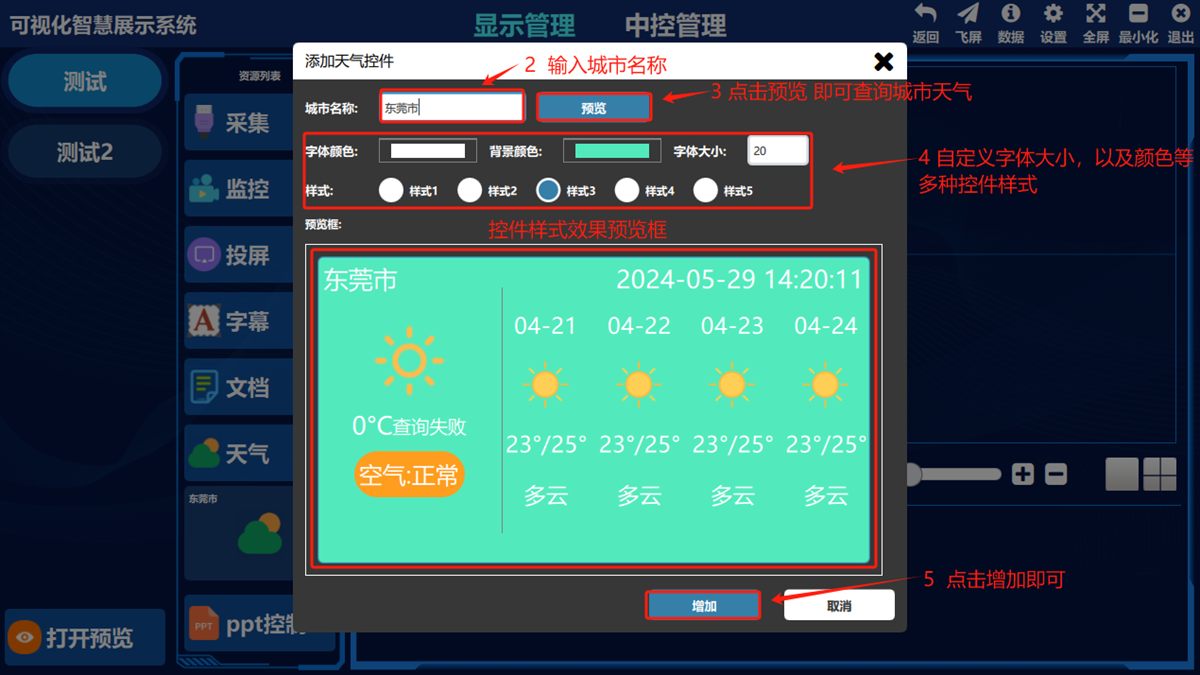
- ② Enter the city name, ③ click 预览(Preview) to look up the weather for that city, ④ optionally customize the widget text size, background color and so on and pick a weather style, ⑤ click 增加(Add)
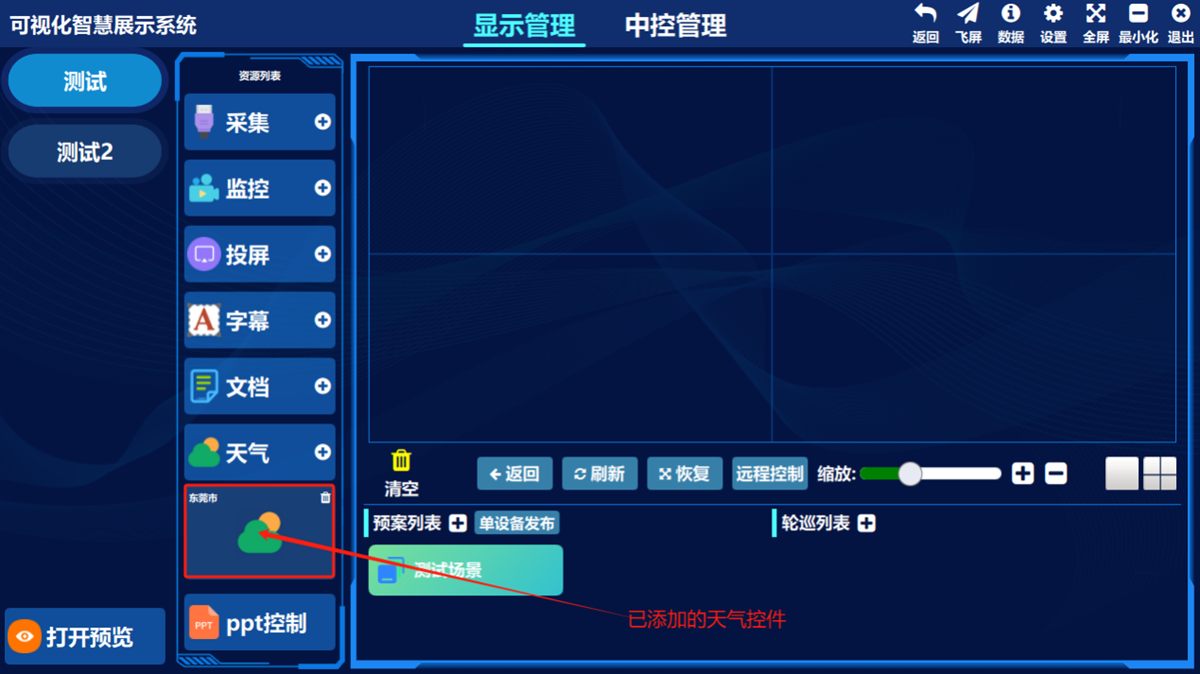
Click 天气(Weather) in the left-hand asset list and the city weather widget you just added appears in the preview pane below.
Was this page helpful?A one-line note helps us make these steps more accurate.