Documents
Change the Device IP Address
Before configuring the device, set the PC IP to the same subnet as the device; it must not be the same IP address as the device.
New devices ship with default IPs starting at 192.168.168.200 and increasing in sequence; set the PC IP to 192.168.168.100.
Check network connectivity: when the settings are applied, open a command window by typing cmd in the PC “运行”(Run) box and run ping 192.168.168.200. If you receive replies, the PC and the device are connected.
1、Open the PC network connection settings → right-click the connected network adapter and select Properties.
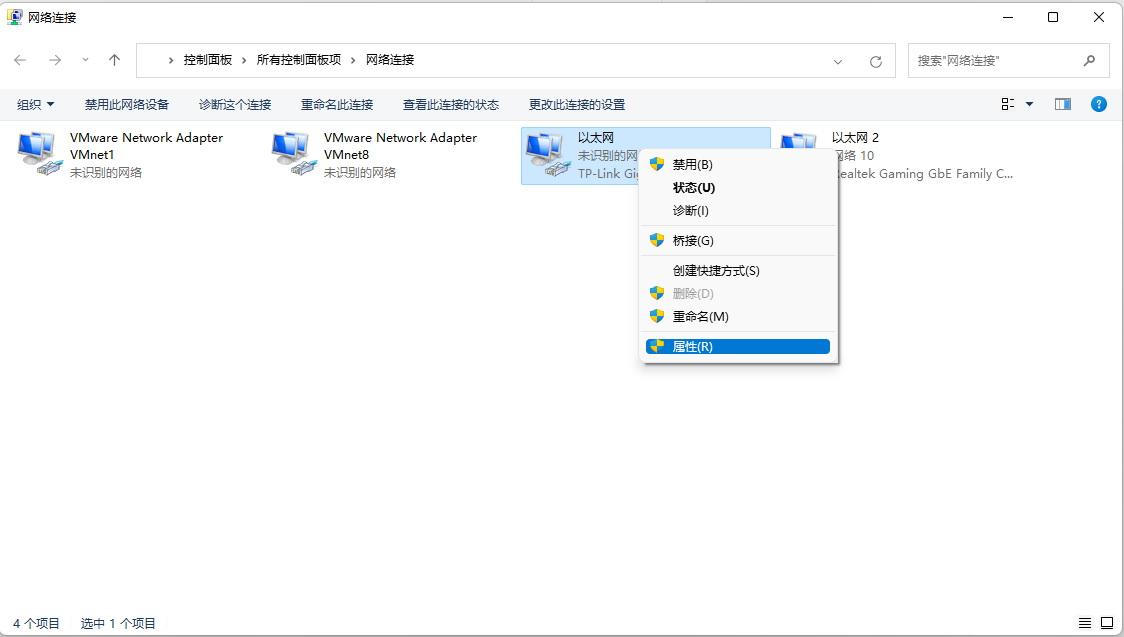
2、In the “以太网属性”(Ethernet Properties) window that appears, double-click “Internet 协议版本 4(TCP/IPv4)”(Internet Protocol Version 4 (TCP/IPv4)).
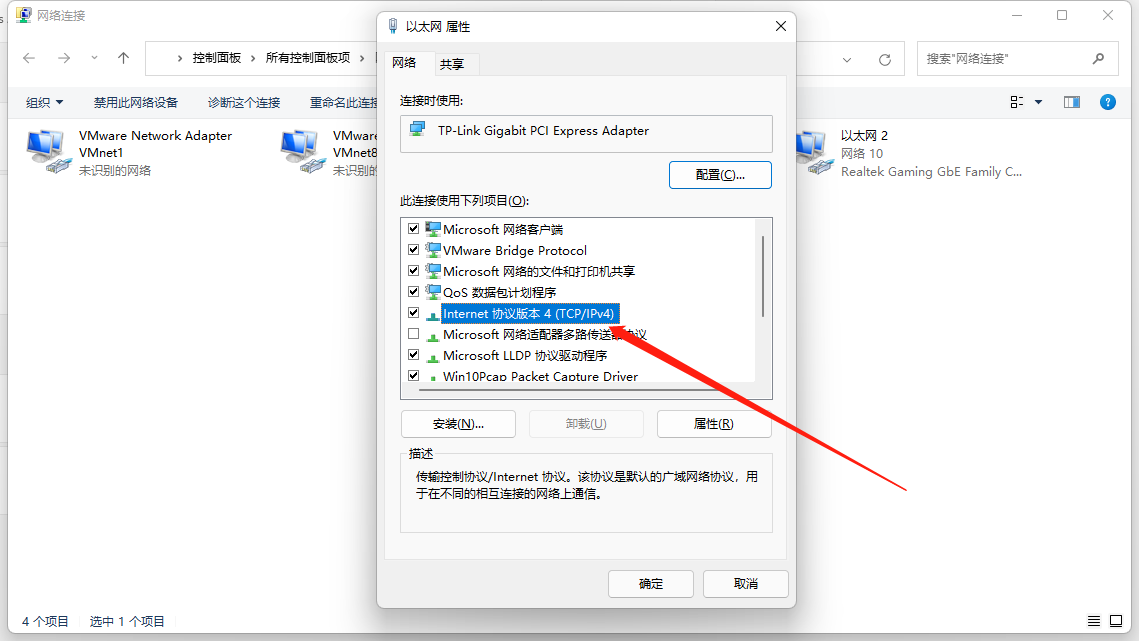
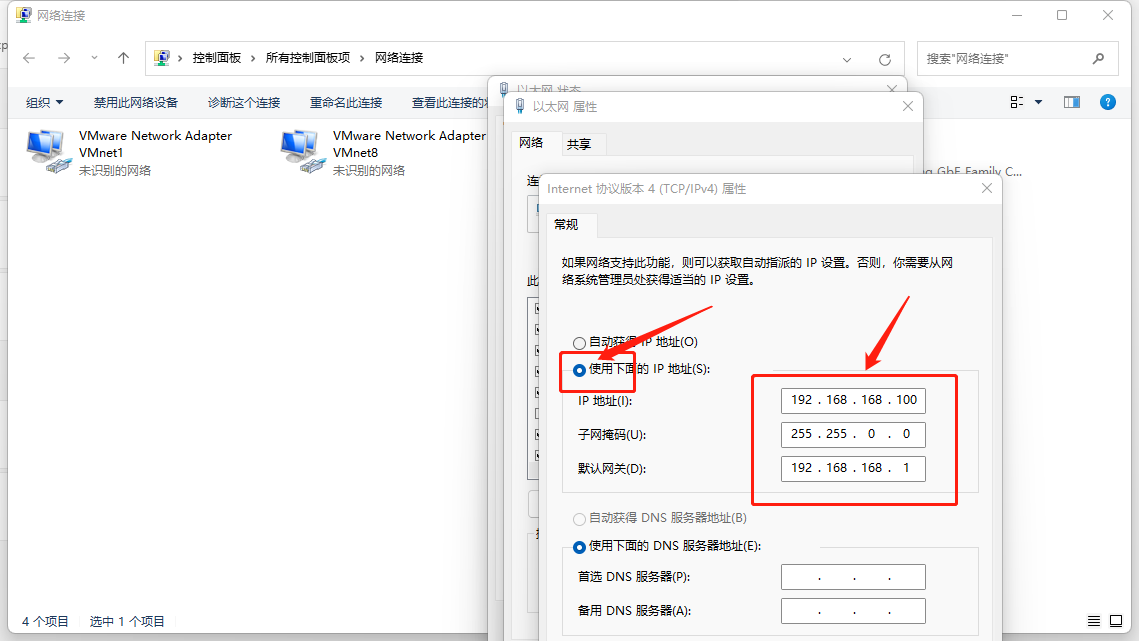
3、In the “Internet 协议版本 4(TCP/IPv4)属性”(IPv4 properties) window, select “使用下面的 ip 地址”(Use the following IP address) and set the parameters as follows → IP address: 192.168.168.100, subnet mask: 255.255.0.0, default gateway: 192.168.168.1.
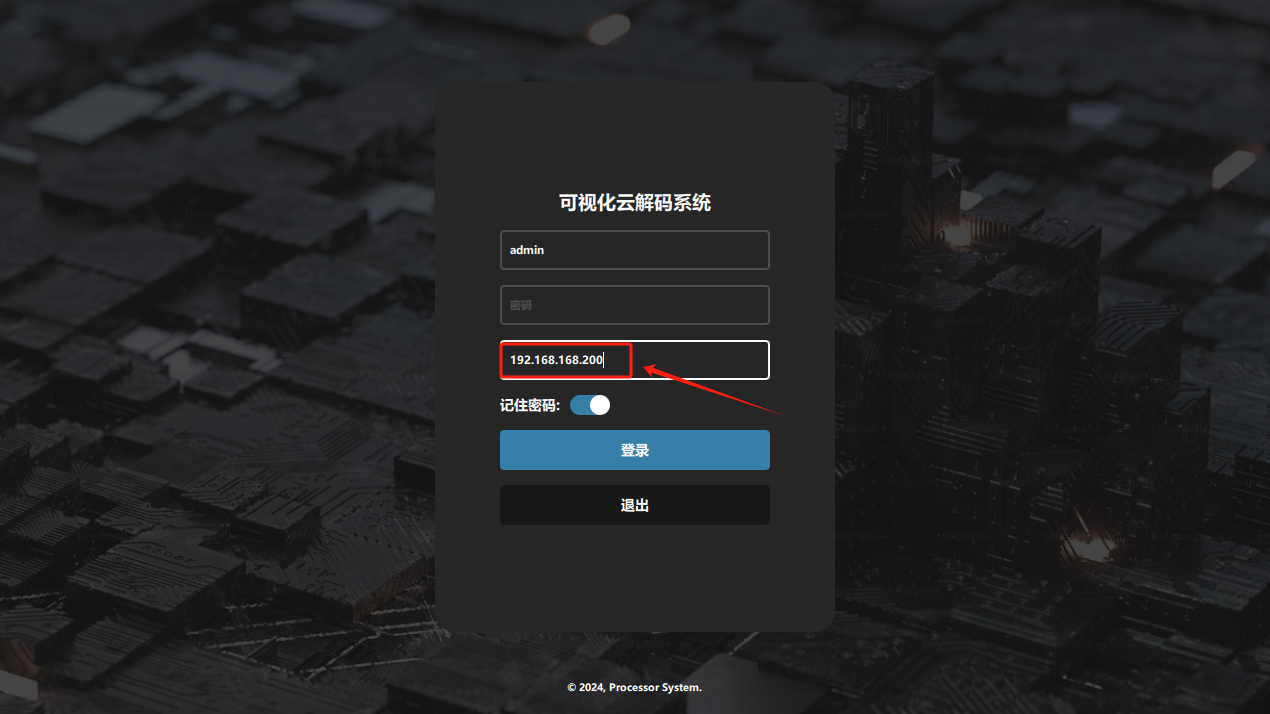
Double-click the installed “可视化云综合管理平台”(Visual Cloud Management Platform) application “” to open the login screen. On the login screen, enter IP 192.168.168.200, account (default): admin, password: none.

If login fails, check in this order: ① whether the PC IP and the device are on the same subnet; ② whether the device network port LINK LED is normal; ③ whether the PC firewall / antivirus software is blocking the connection; ④ whether the device IP has been changed on site (if so, log in with the new IP). See “Login troubleshooting” in the “快速上手”(Quick Start) chapter for details.
Note: there are two ways to change the IP — changing a single IP manually, or changing IPs in one click. Which one to use depends on the site. Both change the device IP address; plan the IP addresses carefully when changing them and never allow an IP conflict.
1. Manual change
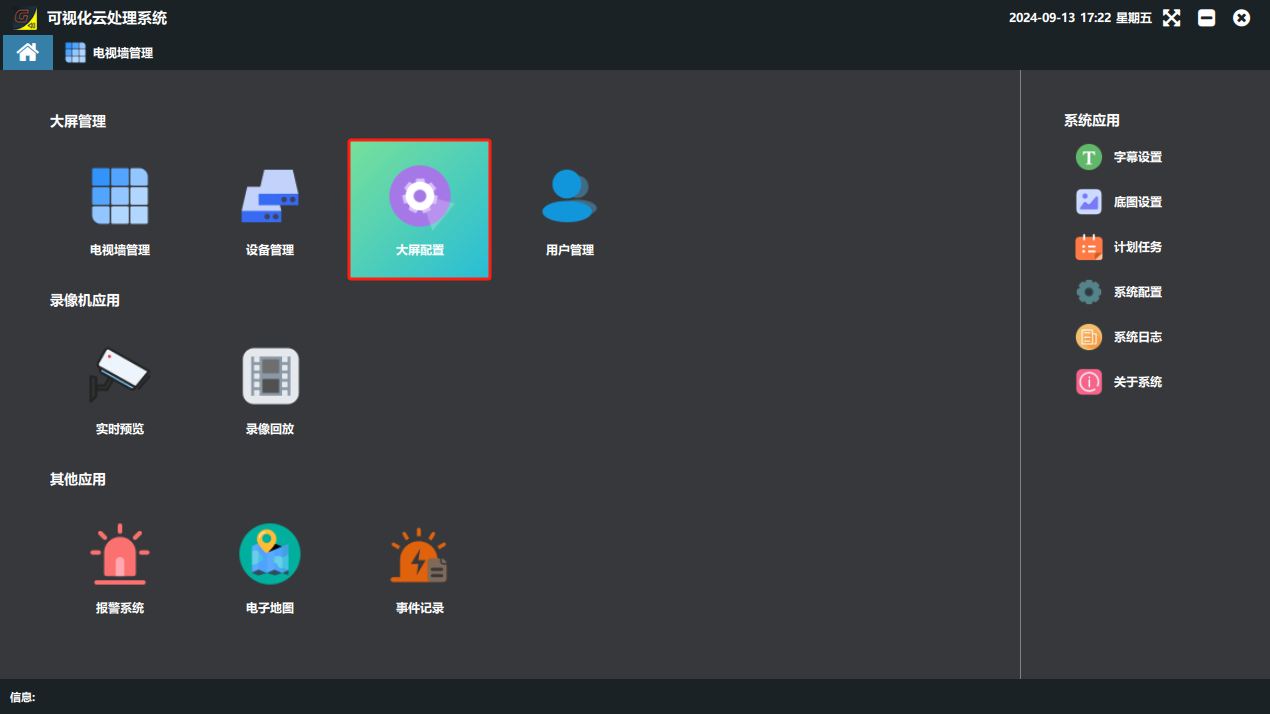
① Click the “大屏配置”(Video Wall Configuration) button in the software.
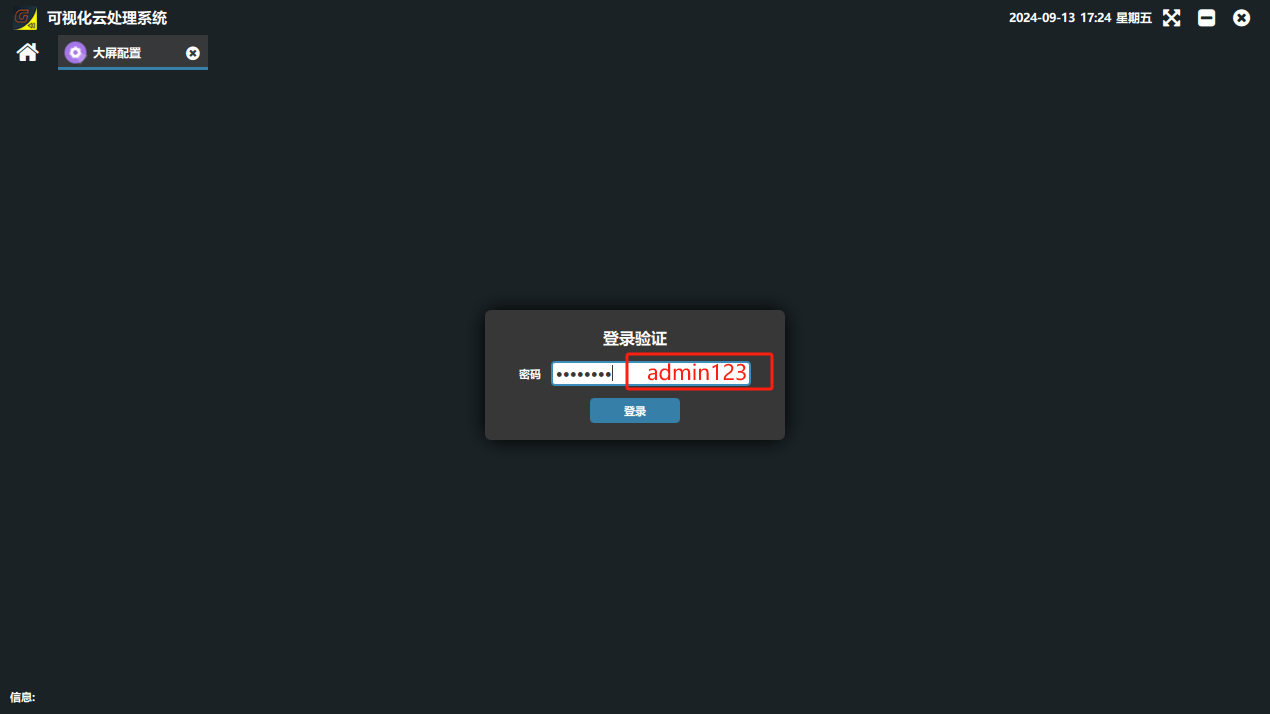
Configuration tool login password: admin123
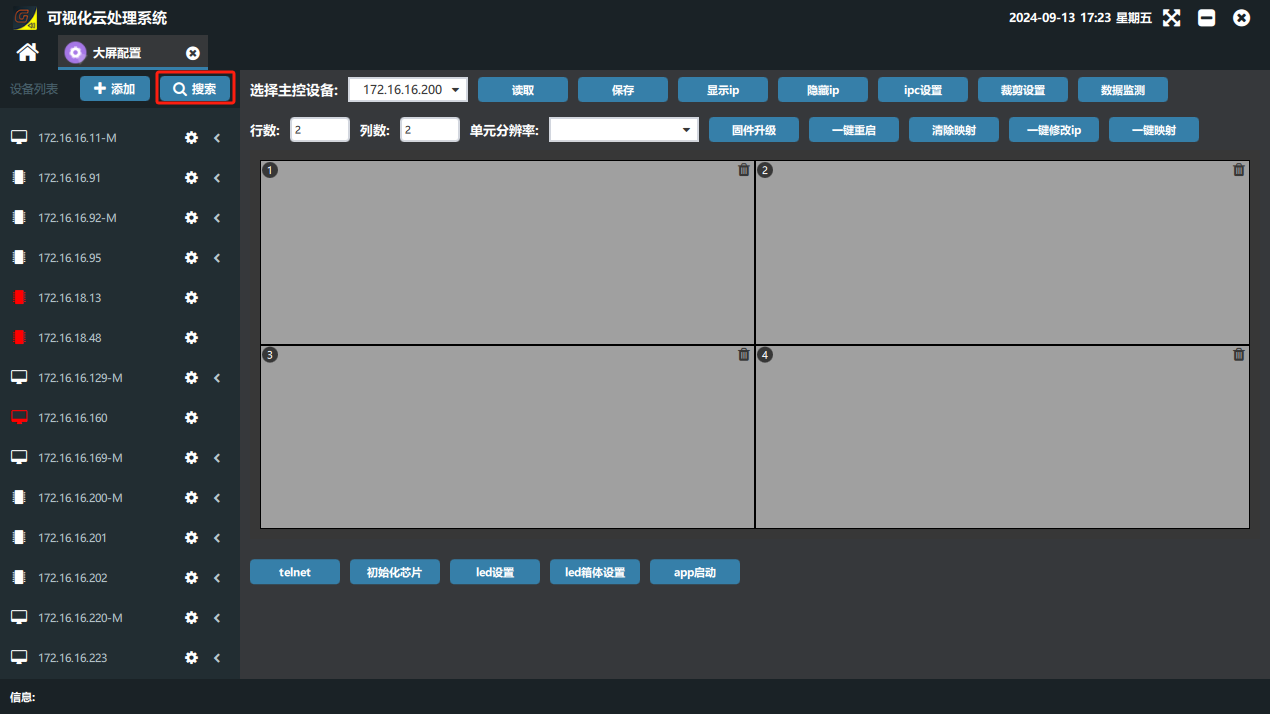
Click “搜索”(Search) in the window that appears to search for the IPs of online 板卡(Card) in the local network. (Note: a white IP icon means the connection is normal; a red icon means the card is not on the same subnet as the PC or the IP conflicts.)
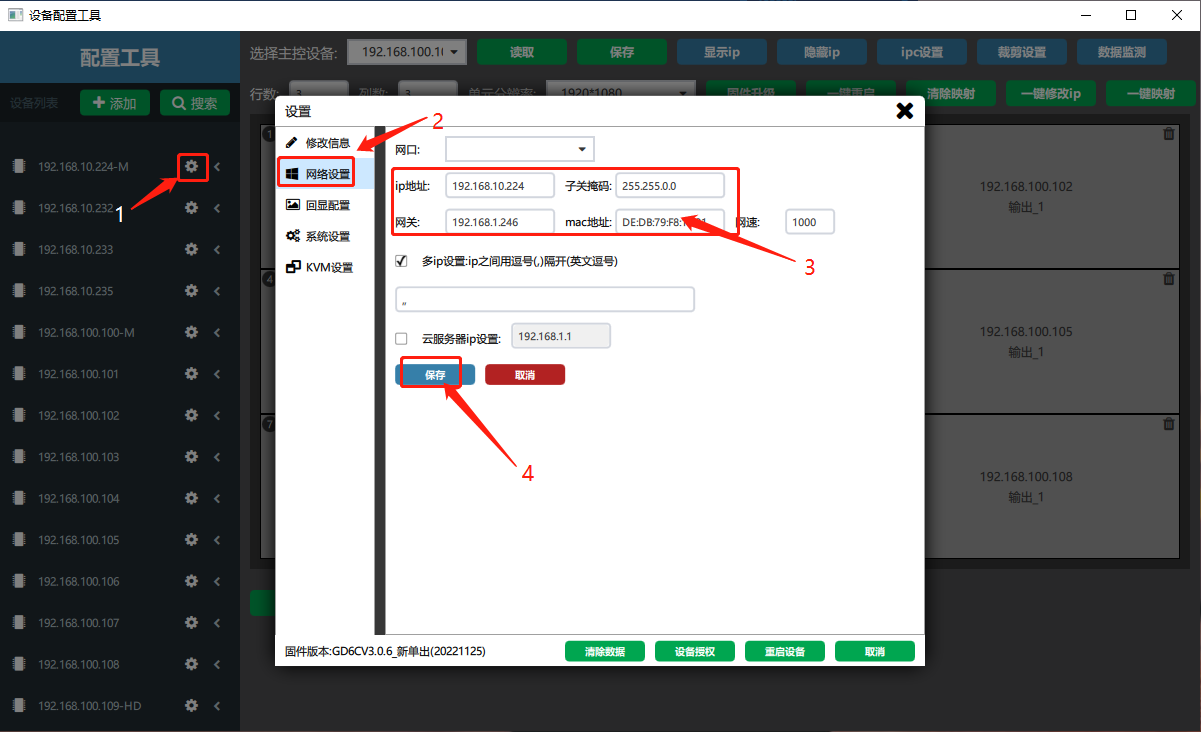
④ Click the small gear “” after the searched card IP → in the “设置”(Settings) page that appears, select “网络设置”(Network Settings) → on the “网络设置” page you can change the network parameters: IP address, subnet mask and gateway → when done, click “保存”(Save); the card restarts automatically. (If the device must communicate across subnets, enter an IP of another subnet in the multi-IP field; up to 3 IPs can be set.)

Change every subsequent card the same way: set each card IP to the required IP segment, then redo the output mapping. When the output mapping is done, reopen the software, enter the newly set main control IP on the login screen, and you can log in and use it. (Note: after changing the device IP you must redo the output mapping; see “Output Mapping” below for details.)
【Important】After changing the card IP, change the PC IP to the new subnet as well and reconfigure the output mapping (see “2. Output Mapping” below); otherwise the software cannot connect to the device and the video wall image will be scrambled.
2. One-click IP change
① Click the “一键修改 IP”(One-click IP Change) button “”; in the “一键修改 IP” page that appears, enter the “起始 IP”(start IP), subnet mask and gateway, select the devices to change or select all, and click “开始配置”(Start Configuration). The software then assigns network parameters to every card in sequence from the start IP.

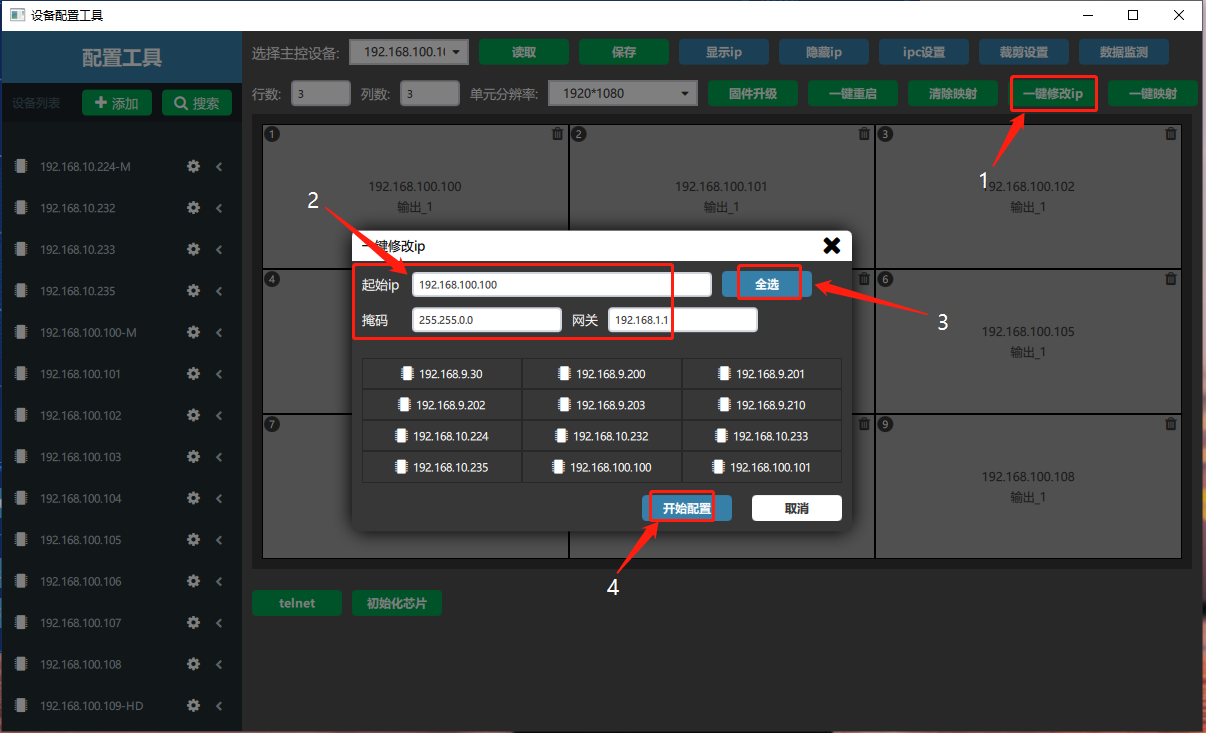
② When the change is done, redo the output mapping. When the output mapping is done, reopen the software, enter the newly set main control IP on the login screen, and you can log in and use it. (Note: after changing the device IP you must redo the output mapping; see “Output Mapping” below for details.)
Did this page help you?One line of feedback helps us keep the steps accurate.