Documentation
Getting Started
Installation and Access
Network Configuration
Verification and Maintenance
Network Optimization: Latency Priority and Acceleration Switches
This page explains what each of the four optimization switches solves and when to turn it on.
The default configuration only guarantees that the network works.
Turn these switches on for lower latency and steadier speed.
Turning these switches on while the sites cannot reach each other only makes troubleshooting harder.
Steps
Step 1 — Open 高级配置(Advanced configuration)
On the platform's network management page, click 高级配置(Advanced configuration).
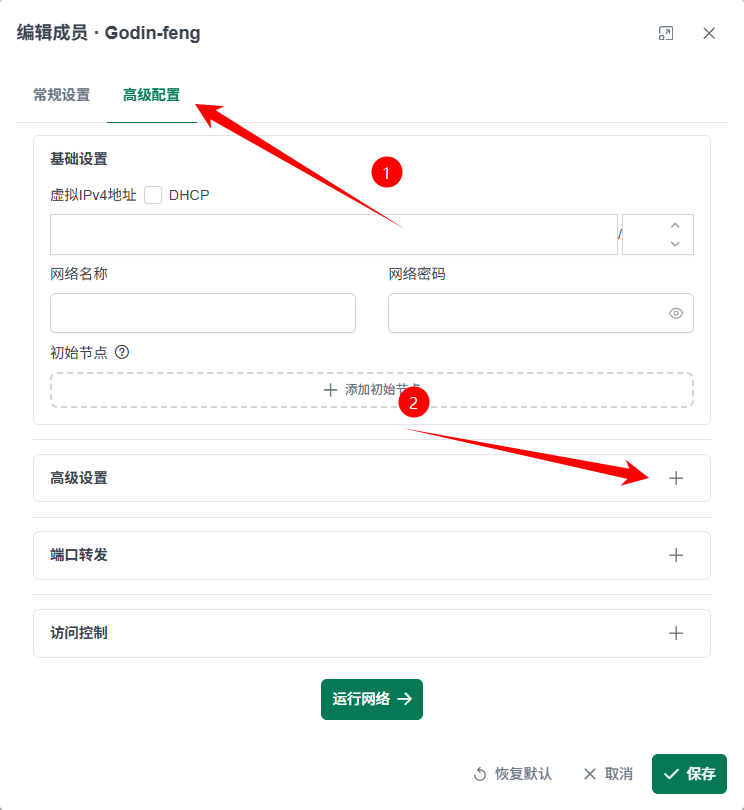
Step 2 — Turn on advanced features
Click the switch to the right of 高级设置(Advanced settings).

Step 3 — Select the optimization items
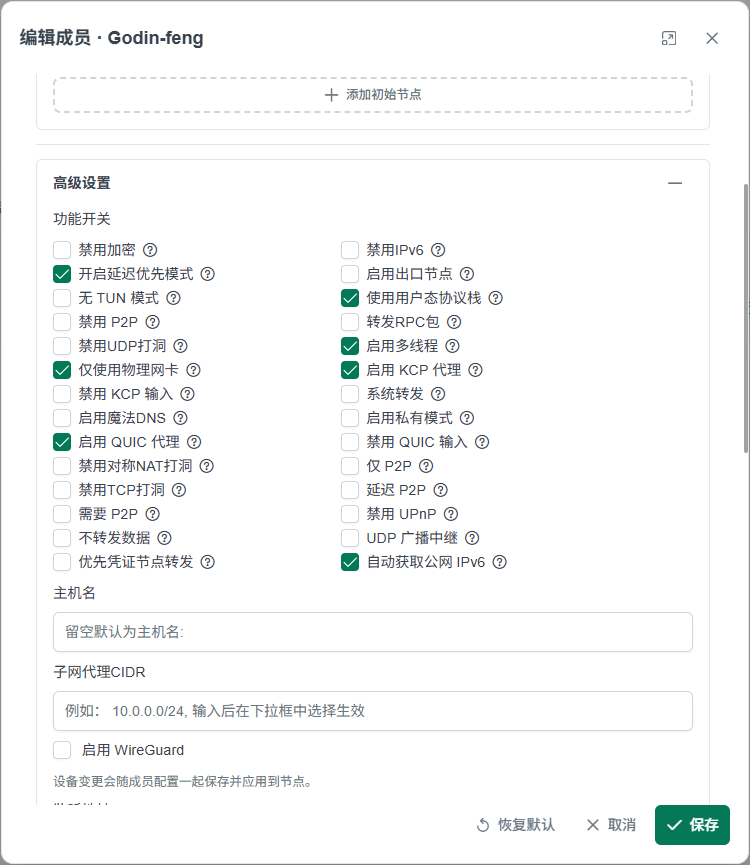
| Optimization item | Effect |
|---|---|
| 开启延迟优先模式(Latency priority mode) | Automatically picks the lowest-latency path; steadier as devices increase |
| 启用 QUIC 代理(QUIC proxy) | Lower latency, higher speed |
| 使用用户态协议栈(User-space protocol stack) | Better compatibility |
| 启用 KCP 代理(KCP proxy) | Lower latency, higher speed |
Select the four as needed; you do not have to turn them all on at once.
- The selected switches show as on.
- Over the next 10–30 minutes, watch whether latency and packet loss change.
The extra overhead of each of the four items, and whether low-bandwidth lines can carry all four. Pending (to be filled in by the content provider).
With all four on at once, you cannot tell which one caused a problem.
Next → Slow network and stuttering surveillance: how to diagnose
Was this page helpful?A one-line note helps us make these steps more accurate.